Greens: Better When Bitter

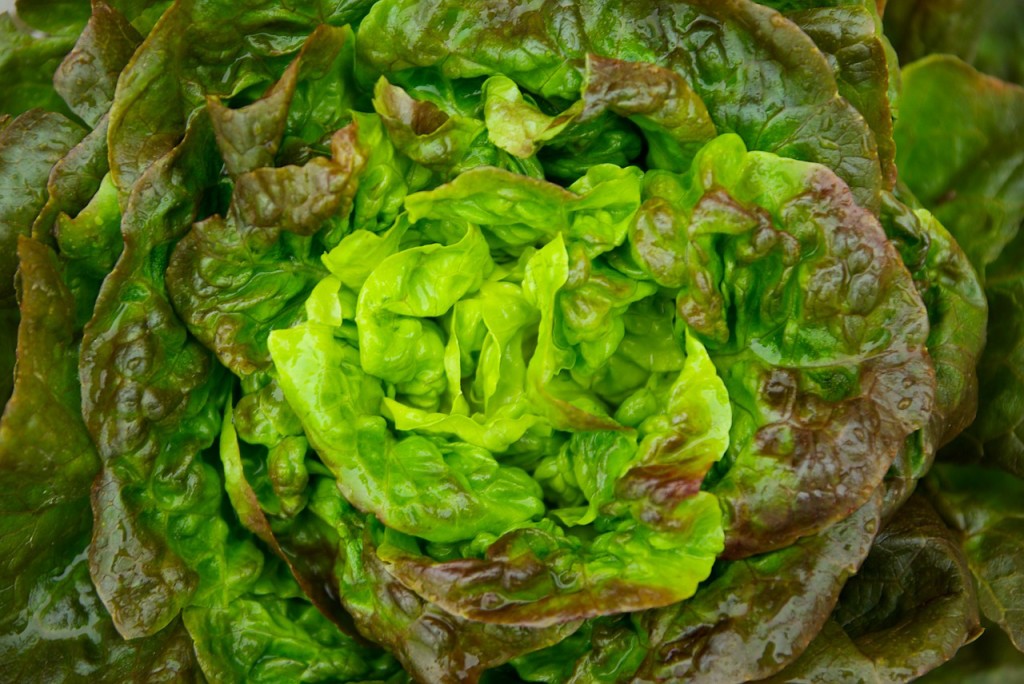
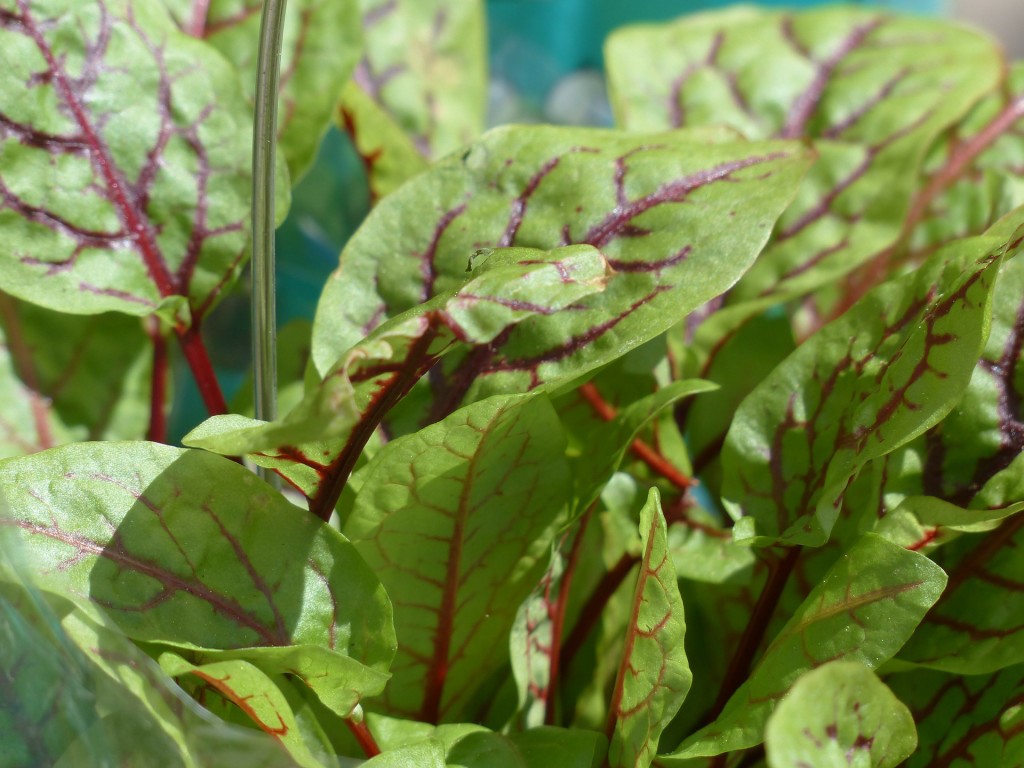
greens7Ah, springtime! Flowers are blooming and gardens are cranking out some fantastic leafy greens. Lucky for us: In terms of the five tastes we perceive on the tongue (sweet, sour, salty, bitter and umami), all greens fall in the bitter category.

But not all greens are created equal.

Some of the first greens up in the spring—like arugula, dandelion and sorrel—are much more bitter than others. And, by their bitter nature, they are not only nutritious, but also promote good digestion, help us to suppress appetite and tamp down sugar cravings.

Still, bitter can be hard to swallow. Other than mixing these greens with milder ones in a salad, what can we do make them more palatable? First, let’s take a look at why you should even try with a look at how good greens are for you.

Nutrition

Bitter greens are loaded with dietary fiber and phytonutrients that protect the plant from the sun’s damaging rays. Antioxidants, for example, are abundant in leafy green plants. They protect the plant’s DNA from the oxidative stress of photosynthesis, the process by which a plant basically harvests the sun’s energy to split water molecules apart into hydrogen and oxygen atoms in order to make sugars (McGee, 2007).

When we eat these leaves, our bodies use the antioxidants to protect us from free radical activity—or oxidation—in our bodies. Antioxidants available in leafy greens include the carotenoids, beta-carotene, lutein and zeaxanthin, and chlorophyll, as well as vitamins C and E (McGee, 2007).

In addition to antioxidants, leafy greens contain thousands of different “phenolic” compounds. They are what give the plant color, fight off microbial threats and attract and repel animals. All fruits, vegetables, and grains contain some phenolic compounds, which, when eaten, offer similar protection in our bodies. For example, arugula and mustard greens, like other members of the cabbage family, contain glucocinolates, a class of phytonutrients, with cancer fighting properties (McGee, 2007, Masé).

Bitter Medicine

Not many of us are wired to love bitter. In human evolution the greens4bitter flavor traditionally meant poison. Bitter foods activate special taste receptors—TR2 receptors—in the mouth and other parts of the digestive tract. The T2R receptors send messages activating an increased production of saliva, stomach acid and bile. Because it is seen as a challenge to the system, foods with bitter flavors signal the digestive tract to slow down and digest food more completely (Masé, 2013).
Promising studies show a connection between T2R receptor stimulation and the modulations of physiological processes, largely in the liver, that keep blood glucose levels under control (Masé, 2013 & Dotson, et. al 2008). Bitter plants also stimulate the intestinal secretion of polypeptide YY, a hormone thought to be involved in controlling human appetite (Masé, 2013).

Bitter greens can also help ease sugar cravings. While simple sugars make our brains happy for a while, they do nothing to activate the gut—especially when eaten alone in foods void of fiber or bitter flavors that can stimulate digestive processes and help our bodies deal with glucose load. This is why some people might suffer from bloating, gas or odorous gas when sweets are overdone (Masé, 2013).

Introducing bitter greens to someone with sugar addiction will help stimulate taste receptors that they may not be using and change their digestion, appetite and eating habits. If you’ve overdone the sweet temptations lately, eating some bitter greens may be just the medicine you need to improve digestion and combat those wicked cravings!

Five Ways To Use Bitter Greens

Steam sauté your greens to use as a side dish or as a complete meal. Serving your greens with a little fat will make the lutein and other carotenes more available to your body. The recipe below, inspired by a recipe found in Moosewood Restaurant Cooks at Home (Moosewood collective, 2013) is an extremely versatile recipe that can make a great entrée, or reduce or eliminate the legumes and serve it as a side dish.

Black-Eyed Peas With Spinach

1 medium onion, chopped
1 tablespoon vegetable oil
10 ounces fresh kale, rinsed, stemmed, and coarsely chopped
1-1/2 cups drained black beans (one 13-ounce can)
ground black pepper to taste
pinch of cayenne or crushed red pepper flakes (optional)

In a large skillet, sauté the onions in the oil for a few minutes until soft. Add the kale to the skillet. Stir for a minute, or two until it wilts. Add the black beans, black pepper, and cayenne if desired. Bring to a simmer on medium heat. Serve right away.

For variety, follow the instructions above using the same amount of onion, oil, salt, black and cayenne pepper and use arugula instead of kale, and garbanzo beans instead of black beans. Be sure to give it a taste before you add the black or cayenne pepper—you might find the arugula peppery enough. If the arugula is too sharp, sprinkle a bit of Parmesan cheese when serving to soften the flavors.

Pesto is always a great way to use greens. Basil usually comes to mind for pesto, but when you think outside the box, arugula, young dandelion greens, cilantro and parsley all become fantastic candidates. Here’s another great recipe based on one found in This Is A cookbook: Recipes For Real Life (Sussman, M. & Sussman, 2012). You may have to modify the recipe a bit to balance flavors.

For example, when the arugula is sharp and spicy, or when I use a dandelion green, I will use a sweeter nut — like cashew or pistachio – and go heavier on the salt.

Arugula Pesto

1/2 cup pistachio pieces (orgreens8 1/2 cup walnuts, or 1/2 cup cashew)
1 garlic clove, minced
2 cups packed arugula leaves (or 2 cups dandelion leaves)
1/2 cup freshly grated Parmesan cheese (or 1/2 cup Romano cheese)
1 teaspoon sea salt
1 cup extra-virgin olive oil

Combine the walnuts, garlic, arugula, Parmesan and salt in a food processor. Pulse to blend.

With the machine running, Open the food tube and pour the olive oil in a slow, steady stream. Process until smooth. Stop to scrape down the sides of the bowl as needed. Taste and adjust the seasonings.

Make a sandwich filler for lunch with a little kick. If you have a mild cheese like Muenster or Swiss, adding some mustard greens, sorrel or arugula and tomato slices will serve as a great contrast and make the sandwich much more interesting. Remember, that pesto is not just a pasta topper! You can also use the pesto recipe above and spread your bitter green pesto on your sandwich to get the same effect.

Add greens to your soups. Just as I’m about to serve a bowl of soup, I throw in some greens. They wilt nicely and add some flavor. If you add them too early, they will pretty much dissolve and offer very little contrast. That said, you really can’t make a mistake here: If they do dissolve, all of their beneficial nutrients will have leached into the soup!

Green smoothies are great if you’re trying to get yourself—or your children—to eat some greens. But don’t start with the most bitter greens! Start with spinach or chard and add two kinds of fruit, like apple and banana or pineapple and pear. If you are an experienced green smoothie drinker and usually use milder greens like spinach, try adding a little arugula and increase the amount each time you make one as you get accustomed to the bitter flavor. If you want to curb bitter, you don’t have to add more sweet: Try adding lemon or lime and taste as you go to see if you need more.

greens1Basic Bitter Green Smoothie

2 cups arugula
1/2 cup yellow bell pepper
1 orange peeled and seeded

Place all ingredients in a blender. Mix until smooth. If taste is too bitter, add a pinch of salt and 1/4 banana.

Though it may take a while to get used to the flavor of bitter greens, it’s worth the effort! Adding greens to your diet helps to curb sugar cravings, improve digestion and supports liver detoxification. Fresh greens are always best – so get planting! Even if you don’t have garden space, many varieties (arugula, parsley and cilantro) will flourish in a window box.

References

Albi, J. & Walthers, C. (1996). Greens, Glorious Greens: More Than 140 Ways To Prepare All Those Great-Tasting, Super-Healthy, Beautiful Leafy Greens. St Martin’s Press: New York, NY.

Boutenko, V. (2009). Green Smoothie Revolution: The Radical Leap Towards Natural Health. North Atlantic Books: Berkeley, CA.

Dotson, C. D., Zhang, L., Xu, H., Shin, Y.-K., Vigues, S., Ott, S. H., … Munger, S.D. (2008). Bitter taste receptors influence glucose homeostasis. PLoSONE, 3(12), e3974. doi:10.1371/journal.pone.0003974

Frawley, D. & Lad, V. (1986). The Yoga of Herbs: An Ayurvedic Guide to Herbal Medicine. Publisher: Lotus Press: Twin Lakes, WI

Kessler, D.A. (2010). The End of Overeating: Taking Control of the Insatiable American Appetite. Rodale, Inc.: New York, NY.

Masé, G. (2013). The Wild Medicine Solution: Healing with Aromatic, Bitter and Tonic Plants. Healing Arts Press: Rochester, VT.

McGee, Harold (2007). On Food and Cooking: The Science and Lore of The Kitchen. Scribner. Kindle Edition.

Moosewood Collective. (2013). Moosewood Restaurant Cooks at Home. Retrieved from Amazon.com.

Robinson, J. (2013). Eating on the wild side: The mission link to optimal health. Little Brown & company: New York, NY.

Sussman, M. & Sussman, M. (2012). This is a Cookbook: Recipes for Real Life. Weldon Owen, Inc. Published by Olive Press.

Wood, R. (2010). The New Whole Foods Encyclopedia (fully revised & updated). Penguin Books: New York, NY.
Tagged with: , , , , , , , , , , , , , , , , , , ,
Posted in Dear Diary

There Must Be Fifty Ways To Use Roast Chicken … Here Are Five

RoastChicken4I’m a girl who loves a bang for her buck. I am fascinated that there are so many uses for coconut oil – face wash and seasoning cast iron skillets? I wonder at the many ways to wear one scarf. And we all know vinegar is used in pickling, dressings and cleaning your kitchen, but my husband just started washing his jeans in it. For real. So the challenge of finding five ways to use one ingredient seems right up my alley. My ingredient … roasted chicken.

Sure, on the surface there are about umpteen million billion uses of chicken. But I wanted to explore how to make it interesting and different. How could roasted chicken be boring in the first place? It’s pretty easy and, done just right, it’s moist and flavorful. I could it eat right out of the oven almost every night of the week. But it takes time; time that I don’t have with an hour’s commute home from work. And with me not being able to stay home as a housewife nor are we able to fit a personal chef in our budget, it took some clever planning to get this right.

My husband and I love to use our Sundays to prep our food for the week ahead. Chicken is one of those staples we cook ahead for using in lunches or quick dinners. We’ve cooked it just about every way – seared in cast iron, poached in a large pot or barbecued on the grill. But one method we’ve yet to employ is roasting a whole bird … until now.

garlicchickenA weekend is the perfect time to do this. There’s something comforting about having a whole bird roasting away in your oven while you’re doing chores around the house. It will make you feel like a domestic goddess (or god for those gents in the house).
Start with a whole chicken, about 4-6 pounds. In some of the larger stores, like Costco, you can buy whole, organic chickens in pairs for about $2.49 per pound. Use one and freeze the other … or roast them both! You’ll get so much use out of the meat throughout the week.

Just as there are fifty ways to use it, there are fifty ways to roast it. A quick Google search or a flip through your cookbooks will yield plenty. A while back we featured a roast chicken heavy on garlic. Or there’s Jamie Oliver’s version in milk with sage and lemon. The Kitchn has an aromatic version inspired by Oliver’s using coconut milk, lemongrass and star of anise. The flavor combinations are virtually endless. As you try different herbs and spices, you’ll find your go to combination. Then, who needs a recipe?

For the most part, a classic chicken is roasted using the following steps, adapted from this recipe on Food Network:

  1. Don’t rinse the bird. Yes, Julia Child and many other chefs told us to rinse. But in recent years food safety experts have warned against rinsing, as it raises the risk of spreading bacteria from the bird all around your kitchen. As long as you cook to a safe internal temperature, the bacteria will be killed.
  2. Preheat your oven to 425 degrees.
  3. Season the bird inside and out. Salt, pepper, herbs, onion and lemons on the inside to flavor from the inside out and a liberal sprinkling of salt and pepper on the outside.
  4. Tie the legs together with twine, then tuck the wings underneath the body. Place the bird on a roasting rack or pan and place into oven.
  5. Roast for 15 minutes, then drop the temperature to 375 degrees and cook for about one hour. The chicken will be done when it reaches 165 degrees internal temperature.
  6. When done, remove from oven and allow to rest for 15 minutes.

Now that your chicken is done and after it’s rested and cooled slightly, remove the meat from the bones. It’s easier to pull now, rather than refrigerating the whole bird for later use. Don’t forget to save the bones for broth!

So … now what? I promised you five ways to use it!

  1. RoastChicken2Soup. Whether you have a batch of homemade broth or you’re whipping up a quick pho, adding roasted chicken is the perfect way to complete your meal. As you heat up your broth or make your soup base, add the chicken in earlier to allow the deep roasted flavors to incorporate as much as possible. A hearty vegetable soup with carrots, kale and celery gets a little help from your leftover chicken, like in Jamie Oliver’s hearty garden soup.
  2. Enchiladas: Having your chicken done ahead of time makes prepping enchiladas even quicker. Take virtually any enchilada recipe and sub it in. To really elevate it, roast your chicken with smokey spices, cumin and lime. Another plus: enchiladas can be made in big batches and frozen for quick dinners throughout the week.
  3. Pasta: Already one of the easiest meals to prep and cook … guess what? It just got easier. A simple pesto or avocado sauce works perfectly with roasted chicken. Whether warm for a hearty dinner or cold for a summer picnic, it’s the perfect one dish meal.
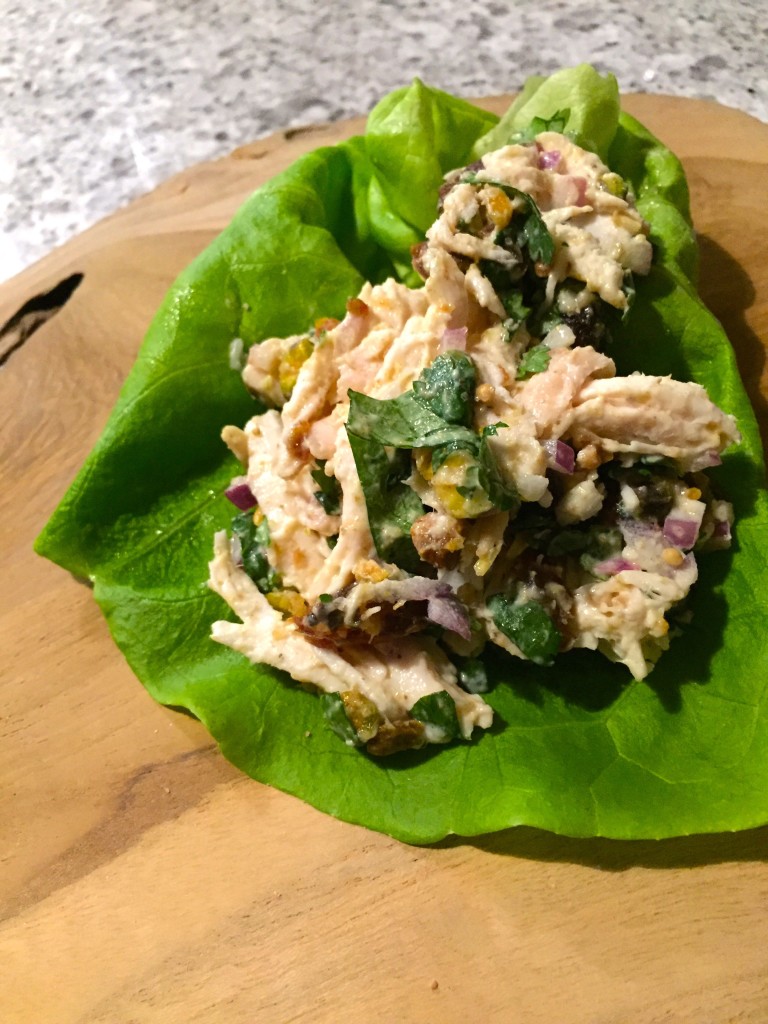
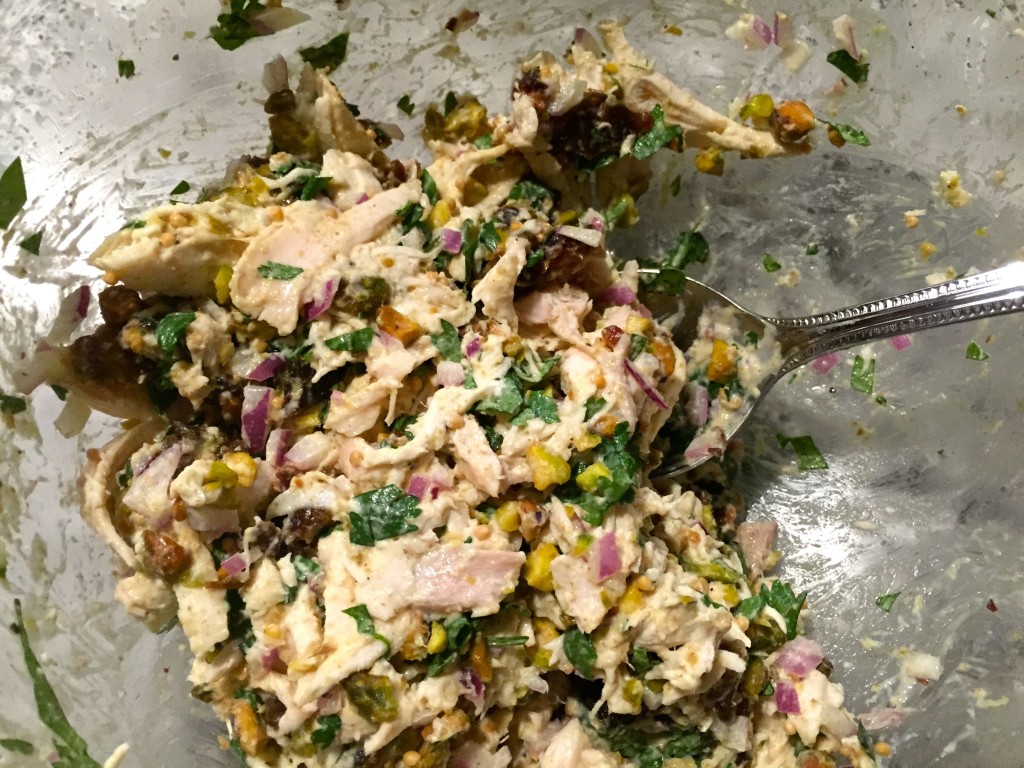
  4. Salad: Speaking of picnics, a chilled chicken salad is the perfect thing to bring. It’s packable and easy to eat, either on a sandwich, lettuce wraps, crackers or spooned right out of the bowl. The combinations are almost endless here too. And you’re not limited to just using mayonnaise. This salad recipe subs out mayo for ripe avocados to bind it all together. Add in fresh fruit (apples or grapes), dried fruit (raisins or dates), celery, onions, herbs and nuts (pecans, walnuts or pistachios). Seriously good and simple. See my curried chicken salad recipe below.
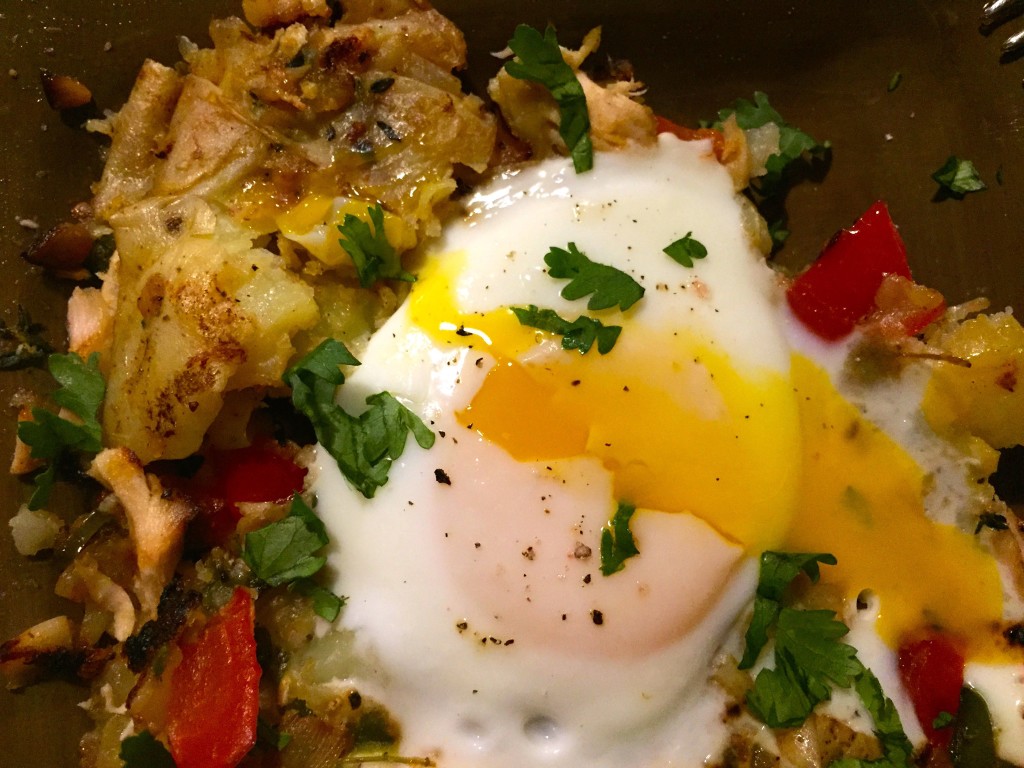
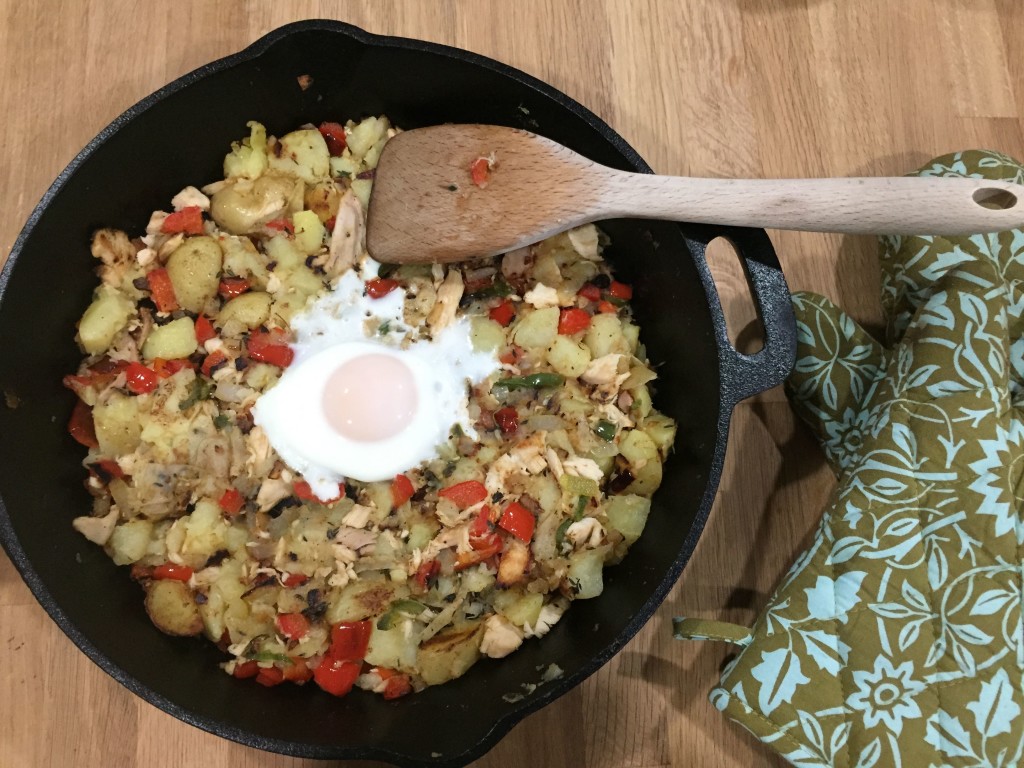
  5. Breakfast: Normally, I don’t think of chicken as a breakfast staple. Well, other than Chick-fil-A’s biscuits…a guilty pleasure, but not on Sundays. But if you find yourself with a little too much roast chicken, try your hand at a hash. One of the most versatile meals – it could be breakfast, it could be dinner – you can add in almost any veggie reaching the end of their life. Start with onions, leeks or shallots, add in potatoes and peppers. Crisp it all up. Why not throw in some roasted chicken? Rather than a classic breakfast meat, like bacon or sausage, the chicken will lighten up an already hearty meal. See my breakfast chicken hash recipe below.

Is it Sunday yet? Well, tomorrow is Saturday. I think I’ll get my roast on early and eat like a queen all week.

Curried Chicken Salad with Pistachios and Dates

I started with a curried chicken salad recipe from Whole Foods, but I substituted the coconut milk and orange juice with mayo and lemon.  I’m a fan of red onions and ginger, so I threw those in too. You could add celery, grapes or apples! It’s easy to adjust for you or your family’s tastes.

1/4 cup mayonnaise, to startRoastChicken3
2 teaspoons curry powder
1/4 teaspoon fresh grated ginger
1/2 lemon, to start
3 cups roasted chicken, shredded
1/4 cup red onion, diced
1/2 cup dates, pitted and chopped
1/2 cup pistachios, chopped
1/4 cup cilantro, chopped
salt and pepper, to taste

Whisk together the mayonnaise, curry powder and the lemon juice until well combined. Stir in the chicken, onion, dates, pistachios and cilantro until all ingredients are coated with the sauce. Add salt and pepper, to taste. If the salad is a little dry, add more mayonnaise and lemon juice. Taste and adjust the seasoning as you like. Serve on bread, lettuce or crackers. Salad can be stored in an airtight container in the fridge up to a week.

Chicken Skillet Breakfast Hash

This hash makes a hearty breakfast or dinner. I found the base recipe on Food & Wine and adjusted to our tastes. The great thing about hash is you can use almost any of the leftover or slightly questionable veggies in your fridge. Try with virtually any bell pepper or spicy chilies, sweet or red potatoes, scallions or leeks … even an addition of bacon cannot hurt.  I added some leftover bacon to mine to get a little more flavor!

2 tablespoons ghee (or butter)RoastChicken7
2 tablespoons olive oil (or any high heat oil, like avocado)
3/4 cup onion, diced
1 cup red pepper, diced
2 cloves garlic, minced
1/2 teaspoon fresh thyme, chopped
2 1/2 cups boiled or baked potatoes, skin on or off and cubed
2 cups roast chicken, shredded
4 large eggs
salt and pepper

Heat a large cast-iron skillet on medium-high. Melt the ghee into the olive oil, swish around to coat the pan. Add the onion, pepper, garlic, thyme, salt and pepper. Saute until soft and browned, stirring occasionally.

Stir the potatoes and chicken into the skillet. Flatten everything down with a spatula or large spoon. Cook over high heat for about five minutes, until the bottom is crispy and brown. Turn the hash over, bit by bit, and cook until the other side is also crispy and browned.

Create four little depressions or concave “holes” in the hash using your spatula or a spoon. Crack each egg into each hole, toss on a little salt and pepper, then cover the hash. Cook until the egg whites are cooked through and no longer runny. Depending on how you like your yolk, cook longer. If you like it runny – and how awesome to have that runny yellow yolk soaked into the hash?! – it should be done when the whites are done.

Tagged with: , , , , , , , , , , , , , , , ,
Posted in Dear Diary

Where Have You BEAN All My Life?

I’m ending this sprouting series with a new beginning.Mung Bean1

When I left my job at NPR last February, my intent was to focus on the blog full time. I launched an event arm of We The Eaters last August with a sustainable seafood event that incorporated a feast from the sea with an informational segment that educated attendees about sourcing the freshest, most sustainable seafood available. It has been an exciting venture, and we routinely are asked what the next big event will be.

I was at a women’s networking event recently when that question was answered … though in a round about sort of way.

I’d donated time to plan the foodie side of the event for the hosts to see if this was something I’d want to do more of. That meant working with the one of my favorite Washington, D.C. restaurants—Compass Rose, recently featured in Food & Wine—to create a memorable menu for the occasion. Guests were impressed, and as I chatted with several of them during the event, the quintessential question of the nation’s capitol was (as it always is) posed:

“What do you do?”

“I’m a food blogger,” is my usual response, but I didn’t stop talking. I added, “… and a personal chef.”

I’m not sure what really came over me. I’d done that sort of thing before as an organized lunch club while working at NPR with a colleague. We’d prepare a menu each week and then take “orders.” On top of that  I’d cooked for friends on a daily basis and for small, private parties. But although I have trained alongside some pretty impressive chefs, I don’t really consider myself a professional chef.

My point is: It certainly wasn’t planned. I had been thinking about the next steps and as I spoke with all of these executive-level women about their lives and careers, about how busy and scheduled they really are … it dawned on me. It’s really hard to have it all—and still get dinner on the table.

Mung Bean7And that’s something I can help with. So it just came out. I signed my first client the next day. A second based on her referral a week later, which is where this post really starts.
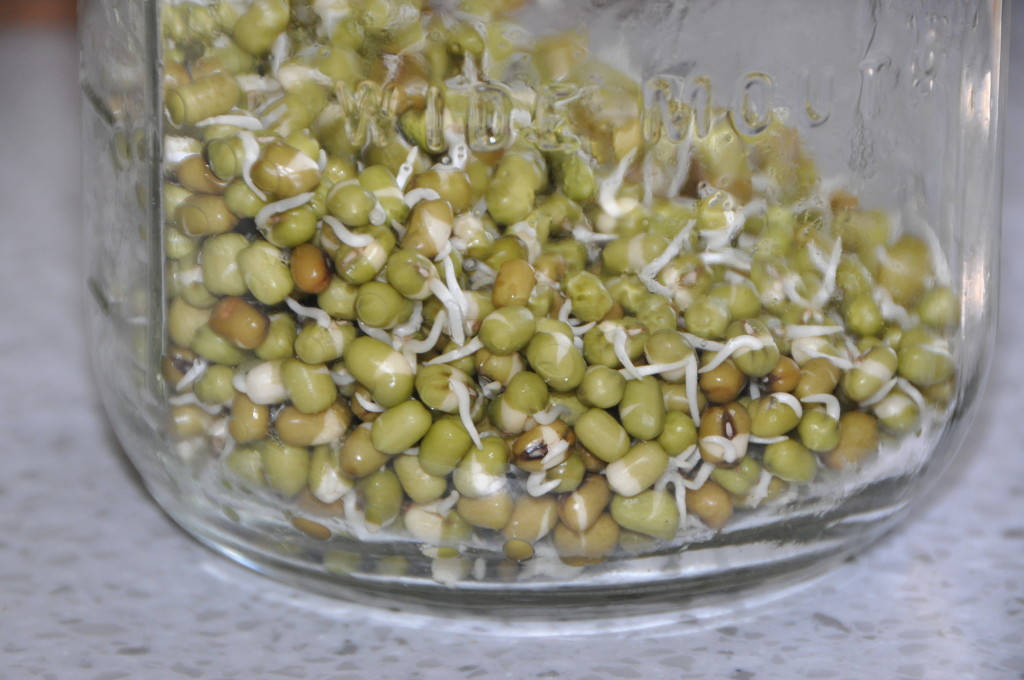
As I was doing my intake with that client, she asked if I did small dinner parties. I said “yes”.

I again scratched my head. Why did I say that? I am just beginning to launch this venture, do I really need to stretch that much? I figured I’d get them two other quotes to make sure mine was competitive and they would surely go with the more experienced company.

They didn’t. I ended up cooking a Southeast Asian feast inspired by my trip (and cooking classes) in Bali for more than a dozen people, including the former ambassador to Indonesia. He described the food as extremely authentic.

But the process? It was terrifying—and I mean really, really gut-wrenchingly terrifying. Will I have enough food? Will these flavors work together? Despite my asking half a dozen times, what if someone is actually allergic to shrimp—as a paste made from the wee crustaceans was an ingredient in many of the dishes? What if it is too spicy?

It was perfect, and I think the moral to this story is that sometimes, you just have to step outside your comfort zone to see what you’re truly made of.

As it turns out, I’m made of mung beans.

No, not really … but I need to get back to the purpose of this week’s sprouting post. One of the dishes I made for the event featured sprouts.

Lumpia are spring rolls that originated in China, but are made across Southeast Asia. I’ve included my own recipe here, but there are an infinite number of versions and possibilities to choose from, including a Filipino version made with shrimp and pork or this vegetarian version, which is what I made for the party. The recipe below is one I plan to stick with, swapping out ingredients based on what I have in the fridge (no celery … use bell pepper!)

The mung beans are pretty easy to sprout. I loved the guide on DSC_0245Vegetarian Times website. As Adam mentioned last week, I use the Sprout-Ease lids and a large, sanitized mason jar. Place mung beans in jar, add lukewarm water and replace slotted cap or cheesecloth. Swish to rinse, then drain. Repeat the process, if desired, then fill to cover beans and let sit to soak for 8 to 12 hours, covered with cheese cloth or paper towel secured with a rubber band.

After soaking, repeat the rinsing process twice, then tilt the jar slightly sideways and shake the beans so they cover a wider expanse of the jar. Prop into a glass bowl—I used my Pampered Chef measuring bowl—to allow continued draining and set somewhere in natural, but not direct, light. Rinse thoroughly twice daily, swishing water through thoroughly each time before you repeat the “propping” process. Beans will sprout within four days, though mine were ready in slightly less time. Rinse well, replace solid jar cover and refrigerate.

Mung bean sprouts should be used within two to three days. Special care is needed with this kind of sprout—please review safety guidelines here. We won’t be eating them raw with this recipe, but if you do, employ safe food practices … and enjoy!

A small admission here: I’ve always been obsessed with sprouting. When I was a little kid, we must have done something like this in science class, and afterward, my mother would find my little sprouting experiments hidden under my bed, in the drawers—pretty much all over. She was not amused. What can I say?

I guess I was born a chef.

Lumpia

This recipe was inspired by this recipe at Wil & Wayan’s Bali Kitchen.

Ingredients

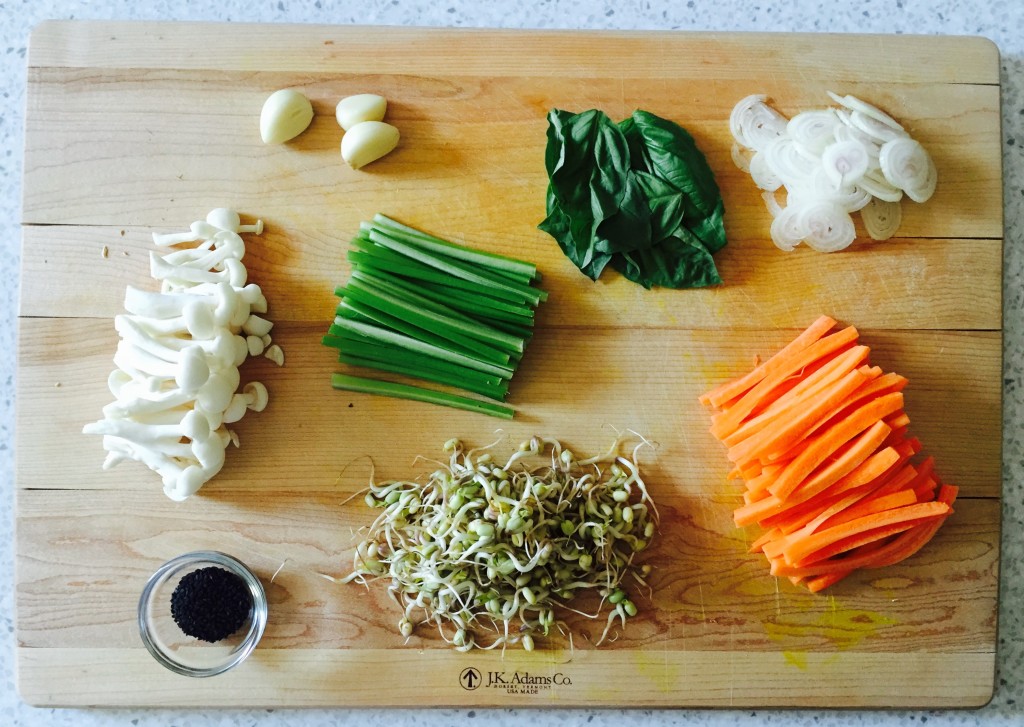
1 small shallot
2 to 3 cloves garlic
2 cups carrots
1 cup celery
1 cup mushrooms (I used enoki, but you can use any kind — just jut to mimic carrot and celery shape)
2 cups mung bean sprouts
1 cup vermicelli rice noodles
1 tablespoon black sesame seeds
1 tablespoon fresh ginger
2 tablespoons kecap manis (sweet soy sauce)
2 tablespoons dark soy sauce
1 egg
10 fresh basil leaves
1 package spring roll wrappers (not the Vietnamese clear style!)
Sesame oil (for cooking vegetables)
Rice vinegar (just a splash for deglazing pan)
Peanut oil (or avocado oil — for frying lumpia)

Method

Soak vermicelli rice noodles in hot water for ten minutes. Mung Bean2Drain and cut into two inch pieces. Set aside.
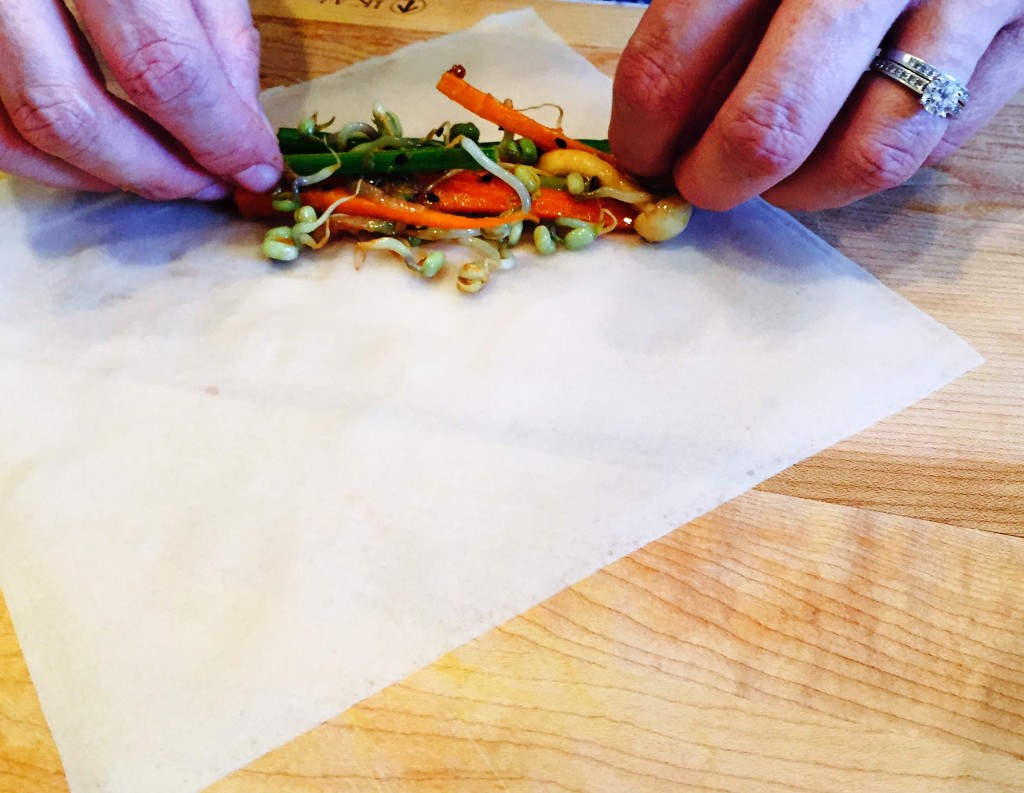
Peel and thinly slice shallot. Wash and peel carrots. Wash celery. Cut both into matchstick-size pieces. (Honestly, I am not the biggest celery fan and find if you don’t cook it enough, it comes out in full, unchewable pieces in the lumpia. I’d use cabbage or bell peppers next time. These are super flexible, though, so swap at will.)

Clean mushrooms (don’t rinse! check out this how-to for mushroom prep and storage) and rinse and drain sprouts.

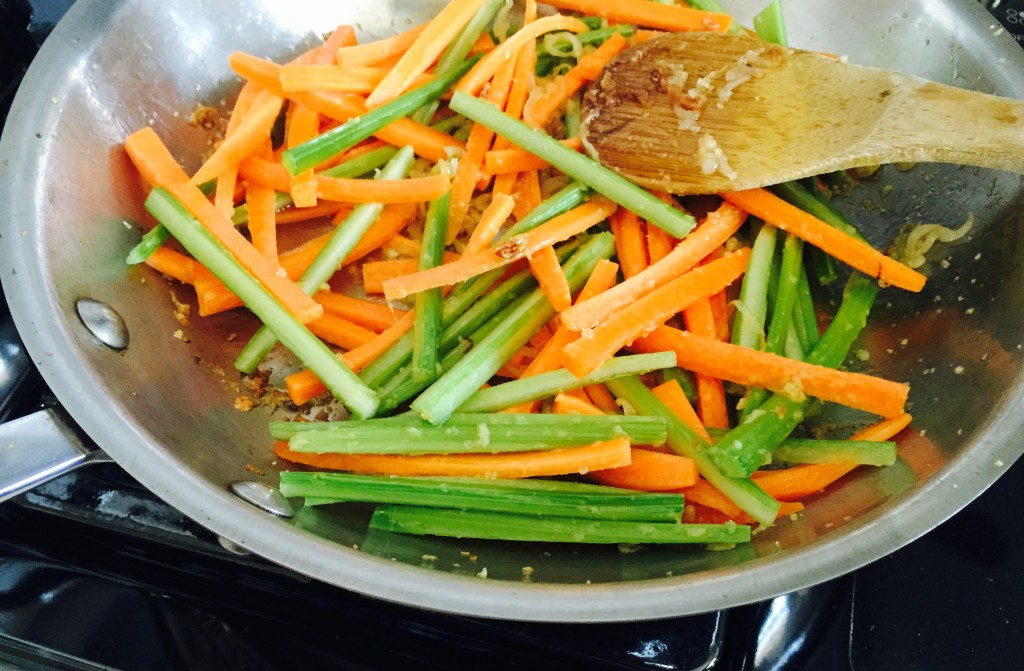
Add sesame oil to pan and heat over medium until it begins to shimmer. Add shallot and reduce temperature slightly, cooking until translucent. Microplane garlic into shallots and stir (this Microplane is one of the most used tools in my kitchen), adding celery. Cook for 2 minutes, then add carrots and cook for 2 to 3 minutes more. Celery should be tender, carrots tender but crisp. Remove to bowl and set aside.

Mung Bean3Deglaze pan with a little rice vinegar and add mushrooms. Saute for 1 to 2 minutes, then add sprouts and saute 1 to 2 more, until slightly wilted, but crisp. Add to carrot mix with vermicelli noodles.
Combine remaining ingredients, including Microplaned ginger, excluding basil, and toss with vegetables and noodles to coat.

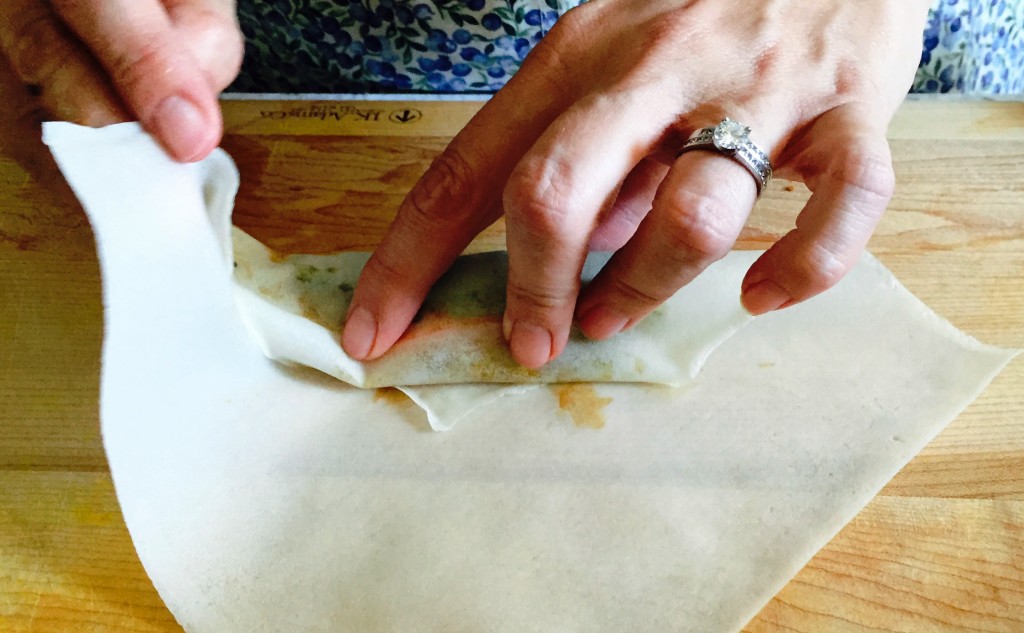
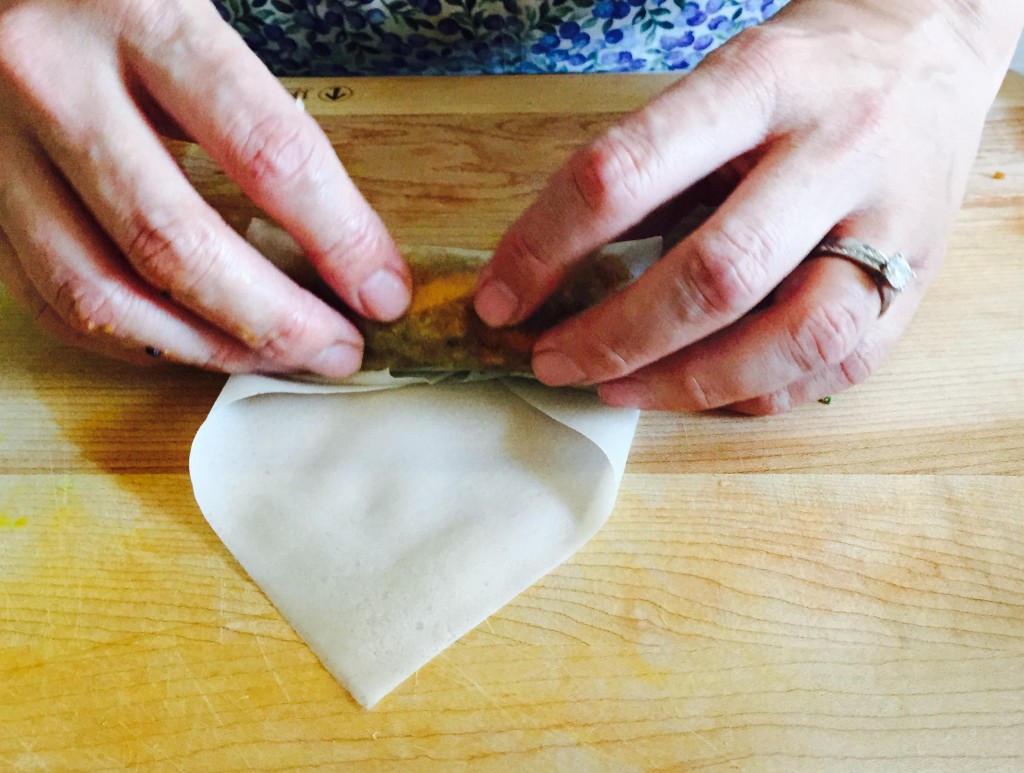
Beat egg and put in small bowl on clean work surface. Open spring roll wrappers and transfer to a plate. Cover with a damp—not wet—paper towel to keep from drying out. Put one wrapper on surface with a corner facing you. Put a basil leaf in the corner closest to you, about two inches from the edge, topped with a small handful of the mix. Fold the corner over the mix and “scoot” it toward you gently to begin the roll.

Mung Bean4Carefully fold over one side, then the other, folding it in more toward the ends to a sharper point so the sides don’t bulge out of the roll. It should be uniform as we begin to roll away from you toward the outer point. Coat that point lightly with the egg mixture and roll to seal, dabbing some of the egg on the outside to close the wrapper. These can be cooked immediately, or frozen with the seal up on a tray before transferring to a Ziploc bag.
If cooking now, heat a thin layer of oil over medium-high heat until it begins to shimmer. Carefully put Lumpia in oil with tongs, turning as it browns, which should be pretty quickly. If they are fat enough, you can cook the sides, too, by propping them against each other in the pan. The total cooking time is typically under five minutes per batch. They cook much Mung Bean5faster in a pan, leaving the insides crisp and perfect. I served mine with Sambal Tomat, one of Indonesia’s spiciest condiments. Try an Americanized version by adding some rice vinegar to make it more palatable if you can’t stand as much heat. We like it hot in our house!
One advantage to freezing is that they can be cooked frozen. I suggest using a small fryer in this case. This is the one we have, which is great for smaller batch cooking like this. It takes about seven minutes per batch, but because they are frozen, the inside takes longer to get hot. They really stay crispy on the inside this way, with less mess from open frying.

Tagged with: , , , , , , , , , , ,
Posted in Dear Diary
photo credit to Aaron Otis Photography 2014


July
Watermelon is the perfect summer food. It hydrates, it cools, it's sweet and juicy. We have some great ideas for your table, including a salad, ceviche cups, popsicles and cocktails. Get ready to beat the heat with us!