New Eating Style: Giving Up Gluten, A Resolution For Life

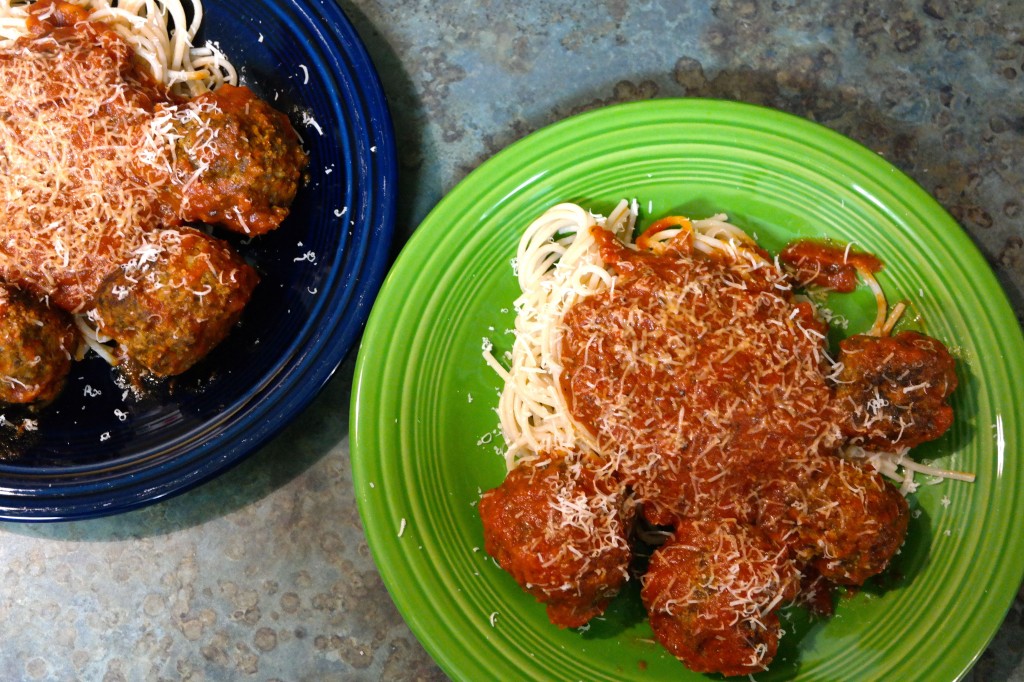
My hubby’s favorite meal we learned to make gluten-free.

It’s that time of year again. Resolutions are made, then subsequently broken. Does that sound overly pessimistic — or all too familiar? Most of us pledge some sort of diet-related New Year’s resolution, like no more sugar or coffee or carbs, all in an effort to rewind our bodies back to before we added on that little winter padding. But what if you were forced to make a diet change, not just to lose weight or get more energy, but because something you’ve been eating is now your enemy?

This past year I’ve been on a journey of my own. Well, let’s say I’ve been along for the ride on my husband’s journey. After months of dating, which lead to months of newly wedded bliss (yes, it was a quick turnaround), I started to wonder … He had frequent migraines, sometimes waking up with headaches that forced him to call off of work. His tummy hurt almost every evening with sharp pains and bloating. Sometimes he would let me in on how he was feeling, but most of the time he suffered in silence, chewing on Tums or popping strong doses of migraine medicine. This was not normal, nor was it healthy.

Then the pieces started to fall into place. An uncle had Celiac disease. An older sister suspected she had it as well and has been gluten-free for 18-plus years. Could he have the disease as well? Or might he have gluten intolerance? What’s the difference between the two? And what is gluten anyway?

What is Celiac disease?

Much of the medical community agrees that 1 percent of the population has Celiac disease and, on top of that, roughly 6 percent more have a gluten intolerance. The disease is a hereditary autoimmune disorder that prevents the body from breaking down gluten, a protein found in wheat, rye and barley (the most prominent sources). It’s diagnosed with a blood test, followed up with an intestinal biopsy.
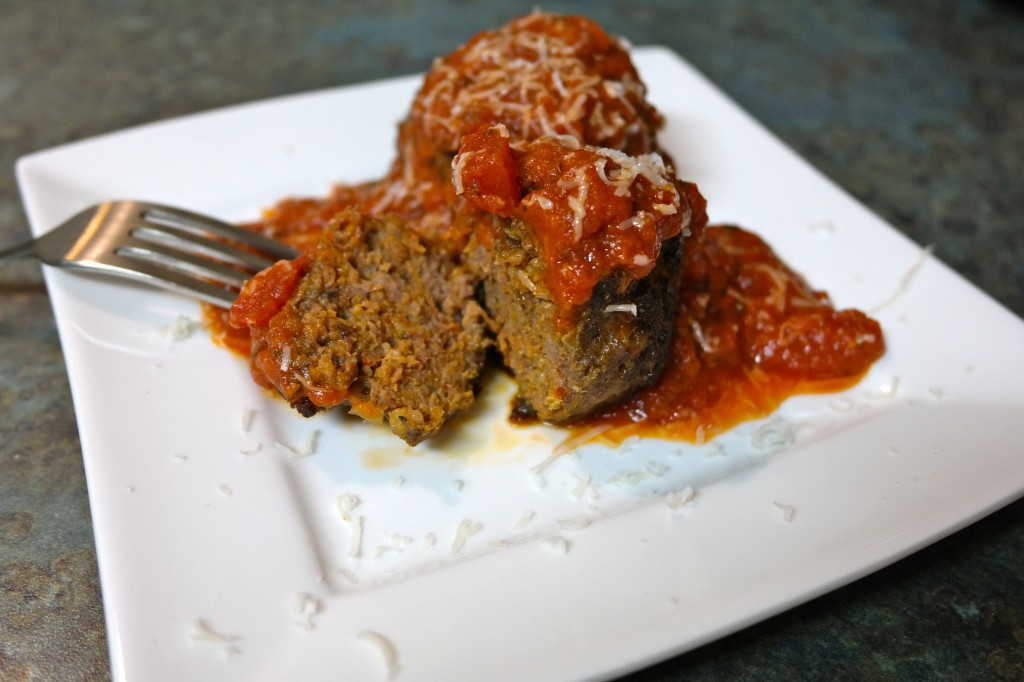
SAMSUNG CSCGluten intolerance is much trickier! It mimics Celiac disease’s symptoms but cannot be diagnosed. In this case, an elimination diet and closely monitoring how your body reacts is the best course of action.

So I broached the subject with my husband -– might all of these symptoms be a huge message your body is sending you? Some nutritionists and doctors believe that the intolerance may be genetic … and he has two relatives, after all, who are now gluten-free. So we gave it a go. Well, he gave it a go.

Should you go gluten-free?

Ten years ago, it was rare to hear of people going gluten-free unless you happened to know someone with Celiac disease and you rarely saw gluten-free products in supermarket aisles. It has since become a sort of fad diet thing. “Remove gluten and shed pounds and gain energy and feel amazing!” some seem to claim. But gluten is not everyone’s enemy and partaking in this lifestyle should not be taken lightly.

Gluten is not generally bad for people. Eating copious amounts of white bread and birthday cake and other processed gluten-y products is bad, though, so everyone will feel better cutting those things out of their diets. But if you do not need to be gluten-free, don’t do it. Just eat healthier forms of gluten, like whole grains and anything not heavily processed.

If you suspect you have the disease or intolerance, see a doctor and/or nutritionist. I’ve even encountered people who have eliminated gluten to combat auto-immune disorders such as Lyme disease, as gluten-y foods can have an inflammatory effect on the body.

What did we discover?

The real challenge is flipping your focus away from what you cannot have and onto what you can have. Chocolate? Yes, thank goodness. Steak? Yes, just watch the sauces and marinades for soy sauce and other sneaky gluten-filled ingredients. Vegetables and fruit and milk and eggs and cheese? All OK. Turns out, there’s still a lot to eat. Just make sure you’re eating a balanced diet, read your labels and educate yourself. The Gluten Free Girl blog has a great introduction.

I’ve altered my diet only slightly, but my husband has completely eliminated gluten from his diet. Having my sister-in-law as a resource has helped tremendously. Having lived gluten-free for almost two decades, she knows what to avoid (after drinking a particular flavor of Naked juice with wheat grass she felt terrible, for example) and which products are the best (Tinkyada brown rice pasta has the best pasta-like texture).

Jim’s journey has brought us closer together – another food adventure.

Now when we get together, it seems like conversation swirls around our new gluten-free discoveries: boxed brownie mixes, recipes and clever ingredient swaps. Her challenge is cooking for her two children, who do not yet have any gluten intolerance symptoms. Even explaining to her three-year-old why mommy can’t try a bit of his super-yummy cookie is a challenge, but she’s a pro at it now!

It’s been an uphill journey, but well worth it. In the almost-year that he’s been gluten-free, my husband’s health has improved immensely. No more daily migraines and his tummy is no longer upset. Without gluten, his body is starting to heal itself.

Still, when something slips through the cracks he feels it the next day, or two. (Most recently it was corn flakes! Here’s a tip -– the second ingredient is gluten-rich malt. Ouch! But no worries — other brands, such as Nature’s Path, make gluten-free equivalents.)

So we’ve learned that giving up gluten is really not that hard. We’re working on finding replacements for the foods that are important to my husband, but most things have simply fallen out of his diet, which makes him healthier in general -– no more fast food, nothing breaded and fried, no bagels or muffins. We work to figure out foods that are important, like gluten-free cornbread stuffing at Thanksgiving and the meatballs that I’m sharing down below. And he’s lost weight too, a positive side effect. It’s a journey we continue to take into the New Year and beyond.

Gluten-Free Meatballs

Meatballs are one of my husband’s favorite foods … so it was one of the first meals we attempted to make gluten-free. The trick is the binder. We found using a basic gluten-free cereal worked very well, as we had it on hand, but gluten-free breadcrumbs or oats would work just as well here.

1 tablespoon saltDD-01032014-GFMeatballs10
1 teaspoon paprika
1 teaspoon oregano
1/2 teaspoon marjoram
1/2 teaspoon ground thyme
1/4 teaspoon pepper
2 cups gluten-free plain cereal
1 large shallot, chopped
4 cloves garlic, chopped
7 to 10 fresh basil leaves, chopped
Parmesan cheese
2 pounds hamburger
1 pound ground sausage
1 egg
olive oil (for cooking)

Add salt, paprika, oregano, marjoram, thyme, pepper and cereal into a blender. Blend into a flour-like consistency.

Combine hamburger and sausage in a large bowl. Add the cereal-spice mix along with the chopped ingredients into the bowl. Add egg. Shred Parmesan cheese on top of the mixture, adding as little or as much as you prefer.

Using your hands, mix all ingredients together until well combined. Roll the mixture into 3- to 4-inch balls.

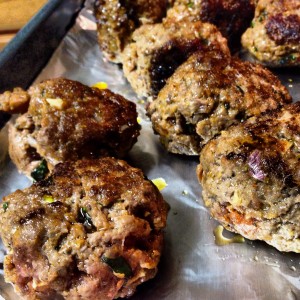
Heat olive oil in a large skillet (I use cast iron). Brown meatballs for a few minutes on each side.

Remove from oil and place into a covered baking dish. Bake meatballs for 25 to 30 minutes at 375 degrees.

Remove from oven and serve over gluten-free pasta with sauce.
Tagged with: , , , ,
Posted in Dear Diary

Butcher, Not Baker

All photographs, including this and the featured image, were taken by Wilhelm A. Hesse for We The Eaters, courtesy of Stacey Wiessbock.

That’s me—granddaughter of a butcher, not a baker. Not a candlestick maker. I hate baking. In fact, I quite often suck at it.

So when I was invited to write for you all, about a sweet amuse-bouches, my first instinct was to ask for something more in my wheelhouse. But as I teach people and companies to embrace their fears and change for a living, it occurred to me that if I can do this—anyone can! And I do have my baking moments, like with my challah, the random tart and banana bread… or when I’m creating treats for my annual holiday party, which is always an amuse-bouche themed event.

As you’ve been reading this month on WTE, an amuse-bouche is a single, bite-sized hors d’œuvre. All of the recipes I share here can be eaten without forks and presented as single-serve items. For space sake, as I expected 40 to 50 people, I presented mine in larger containers, as you can see by the photographs. You could easily serve smaller portions, with nuts in tiny parchment paper cones or eggnog in shot glasses.

Preparations for my party begin in October. I cannot function in chaos and I loathe wasting time. In 2008, I opened Nationals Park as Director of Catering & Special Events, so being organized and planning is kind of in my DNA. I own a label maker and use it regularly. My first step for any event is to grab a small binder to keep all relevant info handy and in one place. I will put a copy of the invitation on the front of the binder. Inside, I create an overview of the upcoming event with tabs for a day-of timeline, a calendar of the month that the event will occur, a shopping list, a free form ideas page, a phone list (helpful if anything is being delivered or if others are participating in making things), a menu or recipes tab, and, if necessary, a table or floor plan section. I am almost always working alone, but if for some reason multiple people are involved, everyone should have the exact same binder and constantly be sharing and updating their binder info. Sharing information and communicating means less stress, and that even the tiniest details will be executed brilliantly!

Here are a few of my tips for “sweet” success:

  • Multiple boxes of parchment are a new baker’s best friend.
  • Before the day of the event, set aside 30 minutes to really read your recipes. Don’t wait until you walk into the kitchen to bake. That way, if you have any concerns or questions you can call a trusted baking lifeguard for assistance.
  • Be sure to lay out your plan and equipment and have all the items your recipe calls for at the ready. It insures a smooth process from beginning to end!
  • I love that I can tell Siri (iPhone’s “personal assistant“) to set timer for 20 minutes and completely fo-get-abot-it… because I always do. And instead of reaching into the oven a failure, she sets me up to succeed!
  • Remember—if it is just awful, no one will know except you. Throw it away and try it again a different day. Noone is perfect, despite Martha’s best efforts to convince us otherwise.
  • Finally: The greatest reward is one earned. I for one am beaming over what I accomplished here, and will be over the moon, if others can find success on my path as well!

For this event, my next step was plotting out my shopping list and what items I would tackle each day. Tackling a project like this seems less scary and daunting when laid out on the calendar, with the estimated time for each activity and mixed in with the rest your life!

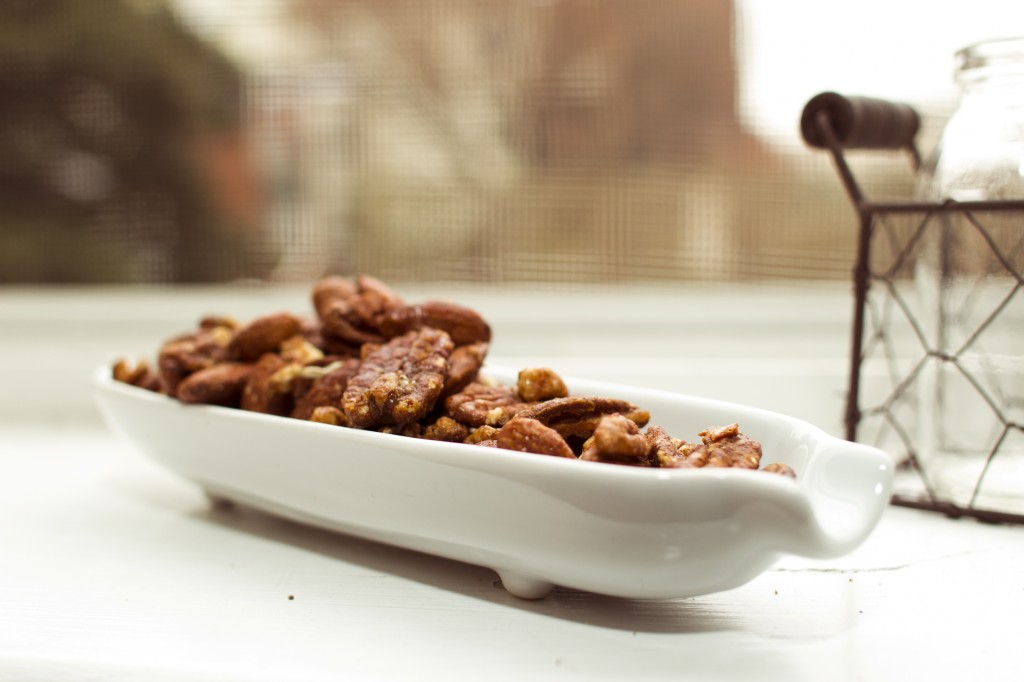
As I always say: Lead with what you know and the rest will follow. I have been making the nuts for years at the holidays, so I tackled those first. Ironically, I don’t actually EAT these, and last year, I changed recipes. People noticed a change but couldn’t put a finger on it exactly. This publication of the recipe will enlighten! The old recipe was great but as I mentioned, it is my nature, both personal and professional, to seek change. So I tweaked it, as with all the recipes here. I believe when you are in the kitchen, you should always make what you are cooking your own. Why else are you making it? Just for the shear joy on everyone’s face?  HA!

Photograph by Wilhelm A. Hesse, courtesy of Stacey Wiessbock

Stacey’s Sweet & Spicy Nuts

Adapted from foodandwine.com.

4 cups nuts (recipe calls for almons and cashews, I use whatever is on hand)
2  large egg whites
1/4 cup of brown sugar
3/4 cup of granulated sugar
1 tablespoon of  kosher salt
1 tablespoon chile powder
2 1/2 tablespoons of Chinese five spice
2 1/2 teaspoons cayenne pepper

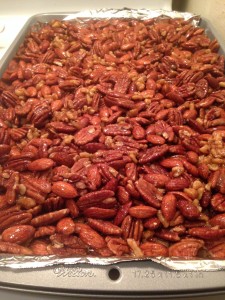
Preheat oven to 300 degrees and line a large baking sheet with parchment. In a large bowl, whisk egg whites until frothy. Combine egg whites and nuts, tossing thoroughly so all nuts are coated.

In a small bowl, mix sugars, salt and other dry ingredients. Add sugar/spice mixture and continue to toss until nuts are evenly coated.

Spread out on baking sheet. Bake for 20 minutes. I recommend that you turn pan in oven, after 10 and stir nuts so they bake & brown evenly, on both sides. Previously I have on occasion noticed some burning due to a high concentration of sugar. Return to oven to bake for additional 20-25 minutes.

Let cool on baking sheet away from stove. When comfortable to touch, use hands to break up and separate. If you wait, it can be a challenge to break apart evenly.

Next I tackled The Popcorn Crack, a recipe from good friend, Kate Gorscak.  I should note that it took about 20 minutes prep time, and you can do lots of other things while this is baking for an hour. This has never lasted in my house longer than 2 days, so I cannot attest to a shelf life!

Popcorn Crack

Photograph by Wilhelm A. Hesse, courtesy of Stacey Wiessbock

Adapted from Kate Gorschak’s recipe from her blog, Small Girl, Big Appetite.

Mix:

9 cups plain popcorn. (I pop mine on the stove top because I refuse to own a microwave, but as KG notes, you can use microwave bags.)
1 bag plain pretzels, broken into small pieces (I prefer whatever is least expensive, plain and whole wheat)
3 cups Crispix cereal
Any nuts in my freezer (I happened to have some sliced almonds that I toasted)

Coating:

1 stick margarine
1 cup white sugar
1/4 cup white Karo syrup
1/4 teaspoon of baking soda
1/2 teaspoon of vanilla

Line a large roasting pan with parchment paper. Combine all dry ingredients and add to the pan.

Using a small sauce pan combine the first three coating ingredients (margarine, sugar and syrup.) DO NOT STIR. Bring to a boil. At 5 minutes, remove from heat & quickly stir in baking soda and vanilla. Immediately pour over dry mix in roasting pan.

Bake at 250 for 1 hour, stirring every 15 minutes.

WARNING: it will burn your tongue, if you do not let it cool!

Photograph by Wilhelm A. Hesse, courtesy of Stacey Wiessbock

An amuse bouche in the form of a beverage? Ode to joy! This South American Eggnog is incredibly rich with a fantastic twist: pureed peaches & vanilla rum! (A short cut note: if you don’t want to buy canned peaches or don’t have any fresh available, baby food peaches are a great substitute!) I happened to have 2 pounds of left over summer peaches in the freezer, which I thawed and slow roasted in the oven. I put half aside for my eggnog and the remainder for my 16-hour Peach Bourbon BBQ ribs (I’ll save that recipe is for another time!)

Once cooled, I picked out the skins and pureed the peaches with a hand blender. It was very thick and made the eggnog a darker color. I admit, if I had just pureed the peaches after thawing them, I might have liked the lighter flavor better in the eggnog. Something to try for next time!

I tested both making eggnog from scratch and using store bought. Sadly, it made no difference in this recipe, so save yourself time and buy it.


Stacey’s Twisty South American Eggnog

2 gallons of store bought eggnog
1 quart half & half
2 cups (1 pound) peaches, pureed
2-3 tablespoons of Chinese five spice (add more or less to your taste)
1/2 to a whole bottle of vanilla rum (add more or less to your taste)

Mix well and let sit in refrigerator overnight. Shake well and serve cold.
I tasted after 18 hours and felt that everything was pretty balanced but we all have different palates– so make it your own!

Marshmallows? Yes, but not those tiny-melt-too-fast pellet-looking things. We’re talking grown up, white pillowy islands floating in a warm cup of hot chocolate. But wait—there’s more! Lavender, vanilla and almond… yes, three flavors. I seemed to get more confident as the sugar flowed and the sweet smell of success wafted from my kitchen. Why not just make a few flavors instead of just one? These mallows are beautifully puffy, remarkably simple and ridiculously decadent—in a cup, on a stick or on their own!

Stacey’s 1, 2 & 3 Marshmallows

Adapted from Smitten Kitchen, June 2009.

3 1/2 envelopes (2 tablespoons plus 2 1/2 teaspoons) unflavored gelatin
1/2 cup cold water
1/2 cup cold water
1/2 cup light corn syrup
2 cups granulated sugar
1/4 teaspoon salt
6 large egg whites
1 tablespoon vanilla (alternately: 2 tablespoons lavender simple syrup, or 2 teaspoons almond extract)
1/2 cup confectioners’ sugar
food coloring for tinting (optional)

Oil bottom and sides of three 8-inch square metal baking pans. Dust sides candy_thermometer_in_potand bottom with confectioner’s sugar. As I’ve said—this is not my wheelhouse, so I was worried I might screw something up. Rather than stress, I labeled each of the pans and the 3 egg white bowls with the different flavors I was making.
Add gelatin to 1/2 cup cold water in the bowl of the stand mixer and let stand to soften.

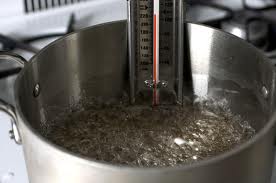
In a 3-quart heavy saucepan cook 1/2 cup of cold water, the granulated sugar, corn syrup and salt over low heat. Stir with a wooden spoon until sugar is dissolved.  Increase heat to medium and boil without stirring, until a candy or digital thermometer registers 240°F- about 12 minutes.

Remove pan from heat and pour sugar mixture into the gelatin mixture, stirring until gelatin is dissolved. Beat the mixture on high speed until white, thick and nearly tripled in volume—about ix to eight minutes. Using a plastic spatula, draw lines in the bowl to segment into thirds for of each of your flavors.With clean beaters, beat two egg whites, the flavoring and food coloring (if desired) in three separate medium-sized bowls until they just hold stiff peaks.

With cleaned beaters, beat 2 egg whites, the flavoring & food coloring(if desired), in the corresponding medium bowl, until they just hold stiff peaks.

Photograph by Wilhelm A. Hesse, courtesy of Stacey WiessbockAdd 1/3 of the sugar mixture and whisk it into one of the egg white bowls until combined. Pour mixture into one of the baking pans. It may not all come out of the bowl—that’s okay. Spread evenly with spatula sprayed with cooking spray (prevents sticking) and sift 1/4 cup confectioners sugar evenly over the top. Repeat with remaining two bowls and pans. Chill marshmallow, uncovered, until firm. (Honestly? I let it sit overnight because, while it took just a little over an hour, I had mentally spent enough time in the Land of Sweets! All I wanted to do was clean up and eat dinner. The next morning, I did wake up excited to finish these.)
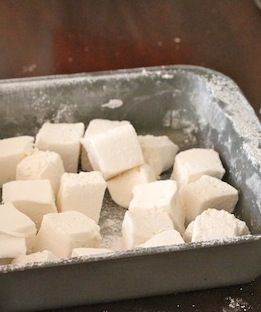
Run a thin knife around edges of pan and turn over onto a large cutting board. Tip one corner of the pan up. With a finger, loosen marshmallow block and ease out onto cutting board. Trim edges of marshmallow and cut into cubes (agian, spray your knife with cooking spray or use an oiled pizza cutter.)

Sift 1/4 cup of confectioners’ sugar back into the empty baking pan and roll the marshmallows through it, coating all sides, before shaking off the excess and packing them away. Supposedly, these marshmallows keep in an airtight container at cool room temperature for one week. If we hadn’t eaten them all two days before the party, these would have been served on the hot beverage bar.

As I mentioned at the beginning of this little adventure: I truly believe if I can do this with success, anyone can! And don’t forget, that in all things—especially in cooking and baking—you should never be embarrassed or too proud to share your errors or challenges. That’s how we learn. Personally I would rather participate in life and fail, than sit by the window and watch the world go by.

“It is common sense to take a method and try it. If it fails, admit it frankly and try another. But above all, try something.”
― Franklin D. Roosevelt, Looking Forward

All photographs, including the featured image, were taken by Wilhelm A. Hesse for We The Eaters, courtesy of Stacey Wiessbock.


Tagged with: , , , , , , , , , ,
Posted in Dear Diary

An Amuse-Bouche In Three Bites, If You’re Lucky

When confronted with making a one-bite dish, such as an amuse-bouche, the first thought that pops into my head is: “Just one bite? Really? Does this mean I can have more than one?” Sure! And then I’m stuffed.
It happens at every party or event when there are little foods passed around. Between the wine or cocktails, the little mushrooms or wieners with toothpicks stuck through them… No matter how tired and boring the finger foods, I still gorge. Maybe it’s the stress of the holidays or the comfort of the same old, same old. But this year it’s time to mix things up. Time to break the old traditions!

Maybe tuna tartare isn’t new to you, but in my family and circle of friends it’s revolutionary. Over half of my potential guest list wouldn’t even touch it. That’s how cutting edge it is! Possibly because it’s fish, raw or my peeps are scared of trying something new, this dish is groundbreaking for many. Luckily, my husband is a willing guinea pig and adventurous eater.

I drew inspiration from an event that fellow Eater, Amy, and I attend every year – Taste of the Nation. Little foods are served and we eat our faces off. It’s an event held at most major cities where local restaurants serve up bites to benefit a childhood hunger charity, No Kid Hungry. You feel good helping out while you sample new foods, check out new local trends and, if you’re lucky, get a glimpse at the likes of Bryan Voltaggio or Mike Isabella.

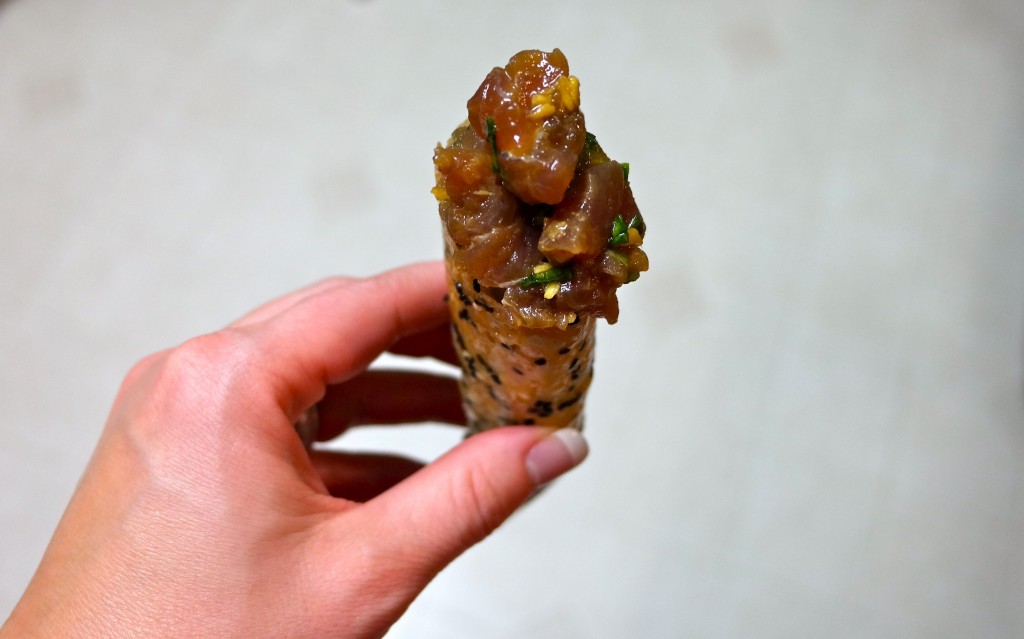
One of the stand out foods we sampled almost every year we attended was the tuna tartare in a little crispy sesame miso cone from Wolfgang Puck’s The Source. Spicy and fresh, a kick of ginger, a hint of sweet in the cone. It’s cute and yummy. Meat in a cone? Come on!

This is what I attempted to recreate. I found several sources and even Wolfgang himself publishes a recipe on his website. What I made differed slightly from his original. Since my husband has a gluten allergy, I had to swap the soy sauce for a gluten free version as well as the flour in the cone dough.
The tartare was super easy. The cones? Not so much. The dough was easy to make and they don’t have to bake too long to get golden brown. But you do have to make sure you spread the dough out or else they will join together into one solid rectangle. The amount matters too. Err on the side of a smaller ball of dough. I also attempted to roll these suckers free hand! When you do roll them, be patient. Too soon out of the oven and they fall in on themselves, too long in the oven and they get brittle and break apart. Luckily the recipe makes more dough than tartare. And if the cones don’t work out, just make little crackers out of them! Still yummy.

These will impress your friends and family. And the best part is, they’re more than one bite. Maybe three if you take Sarah-sized bites.

Tuna Tartare In Miso Cones
This recipe is adapted from the Wolfgang Puck recipe I had at the Taste of the Nation for many years. I made it substituting gluten free ingredients for soy sauce and flour.

For the tartare:
1/2 pound ahi tuna, diced small
1/2 cup minced green onions
1 teaspoon minced fresh ginger
1 teaspoon wasabi paste
1/2 teaspoon sesame oil
1/4 cup soy sauce (can substitute gluten free or Bragg’s liquid aminos)
2 tablespoons lime juice

For the miso cones:
1/4 cup sesame seeds
1/2 cup granulated sugar
1 stick (4 ounces) unsalted butter
1/3 cup light corn syrup
1/2 cup unbleached flour (I substituted a gluten free all-purpose flour)

Garnish suggestions:
daikon sprouts
roe
pickled ginger

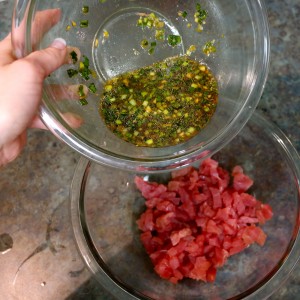
In a medium sized bowl, whisk together the green onions, ginger, wasabi paste, sesame oil, soy sauce and lime juice. Add the tuna either by pouring the mixture over top or stirring the tuna in. Stir together until tuna is well coated. Cover and store in fridge to keep cool.
Preheat the oven to 350 degrees. Using a stand or hand mixer, combine the sesame seeds, sugar, butter, corn syrup and flour until the butter is well incorporated.

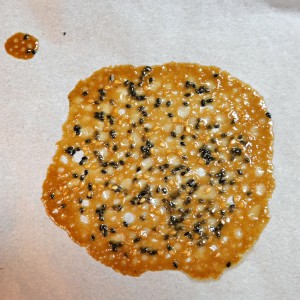
Line a baking sheet with parchment paper. Scoop small, teaspoon sized spoonfuls of dough onto the baking sheet. Space them far apart as they will spread during baking.

Bake for 4 to 6 minutes until golden brown. Note: I needed to bake mine a little longer, but make sure you don’t go too long!

Remove from oven and roll into cone shapes.

Spoon the chilled tuna tartare into each cone. Add a little garnish if you like too! Serve immediately.

Tagged with: , , , , , , ,
Posted in Dear Diary
photo credit to Aaron Otis Photography 2014


July
Watermelon is the perfect summer food. It hydrates, it cools, it's sweet and juicy. We have some great ideas for your table, including a salad, ceviche cups, popsicles and cocktails. Get ready to beat the heat with us!