A Lesson In Souring Your Cabbage

FF-09122014-Kraut7I have always had a place in my heart for sauerkraut. Even as a wee little girl.

Perhaps it is the German in me (my maternal grandmother was only a few generations off the boat) or the Pennsylvania Dutch (my father was born and raised in Altoona, an hour outside of Pittsburgh). Growing up — and even to this day — if we didn’t have sauerkraut with our pork on New Year’s Eve, we just knew we were in for a bad year ahead.

Either way, I am a girl who loves pickled things, and fermented, sour, tangy cabbage seems to be closely related.

The chemical process of fermentation brings those qualities out of cabbage. And while you can alter the taste by adding caraway seeds or juniper berries, or even using a different type of cabbage, the nutritional and health benefits remain the same. Even comparing sauerkraut with kimchee, you’ll find that they are virtually the same … except, of course, kimchee has additional ingredients that give it that real kick-in-the-teeth flavor.

The history of sauerkraut is tightly related to that of its kimchee cousin. It’s believed that Genghis Khan introduced fermented cabbage to Europe after he invaded China. It took root in Eastern Europe and Germanic cultures, where sauerkraut is most famous today. The advantages of preservation made it ideal for long-distance traveling in the early days of exploration.  And sauerkraut’s health benefits were known even then. Captain James Cook, famous for his explorations of Australia and Hawaii, was known to bring it on voyages, as he believed it prevented scurvy.

FF-09122014-Kraut6

Little did Cook know, sauerkraut is full of vitamin C … and fiber, calcium, iron, folate and potassium … and even more vitamins and minerals, in higher concentrations than raw or cooked cabbage. Not to mention all the good belly benefits you get from fermented things, when they’re unpasteurized and uncooked.

While making sauerkraut may seem a bit daunting, trust me — it’s easy! All it takes is a little patience. There seem to be two key elements to making ‘kraut — which holds true to making any fermented food:

  1. Make sure all your equipment — bowls, spoons, jars, knives, cutting boards and even your hands — are clean and rinsed thoroughly free of soap residue. Cleanliness is very important; The process will be making good bacteria, and you do not want to introduce anything that will kill or harm that process.
  2. Fermenting takes time. While the method I followed claimed it would be done after three days, I felt it needed more time. The bubbles — yes, bubbles — didn’t show up in my batch until day three, and it wasn’t quite done in four. I tasted it everyday, checking the pungency was to my liking. After a week it was spot on and I moved it to the fridge.

Now I want to explore pickling further — different flavors, different veggies. Sauerkraut may just be a “gateway drug” into a whole new fermented world for me. But, unlike the early European explorers, I promise to tread lightly …

“Quick” Homemade Sauerkraut
I followed a method I found in the Kitchn’s lessons. Since the ingredients are extremely simple, I didn’t deviate too much.

1 head green cabbage, medium size
1 1/2 tablespoon kosher salt
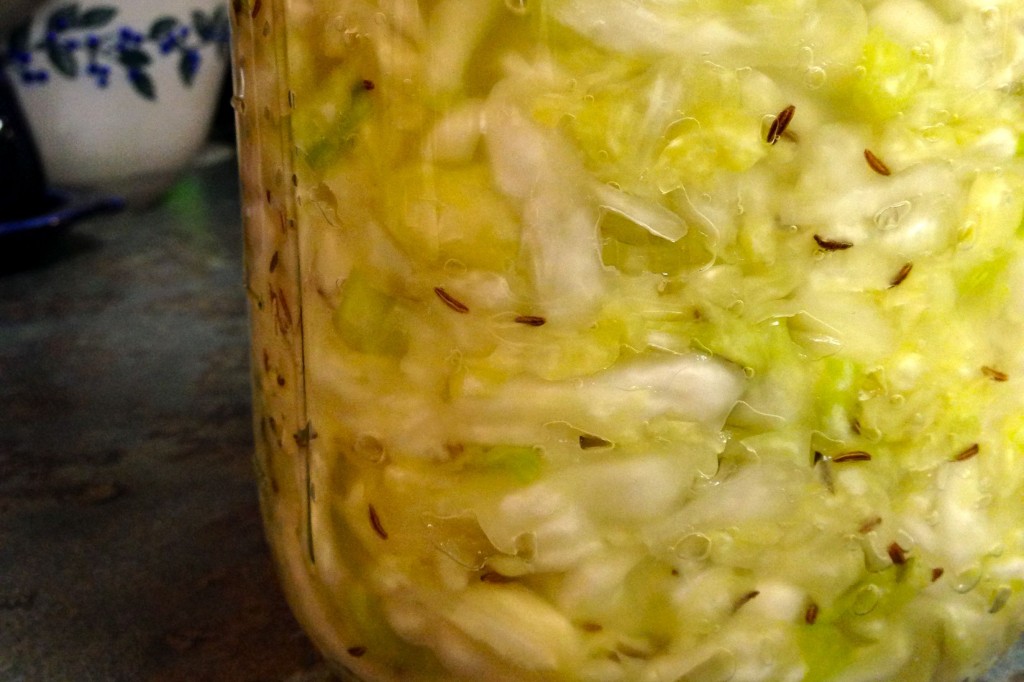
1 tablespoon caraway seeds

FF-09122014-Kraut1Start by giving everything a thorough cleaning: the cutting board and knife, large mixing bowl, the 2-quart wide-mouth mason jar and the canning funnel.

Discard any limp outer leaves. Save at least one good leaf for later. Remove the core from the cabbage by cutting off the end. Slice in quarters and remove any bits of core left over. Cut each quarter, again, in half lengthwise. Slice each section into thin ribbons by cutting cross-wise. Throw all sliced cabbage into the large mixing bowl. Note, I used a very large stockpot, as that was the largest “bowl” I had on hand.

FF-09122014-Kraut4Add the salt to the sliced cabbage. Begin to mix the salt and cabbage with your hands. The process of massaging and squeezing the cabbage will release water. You will see the cabbage begin to shrink as well. This process should take 5 to 10 minutes. Mix in the caraway seeds.

Transfer the cabbage to the large mason jar. As you add it in, use your hand or fist or something that fits into the opening to mash down the cabbage. The amount of cabbage may not seem like it will fit, but it will as you push it down, compacting it towards as the bottom as you continue to add it all.

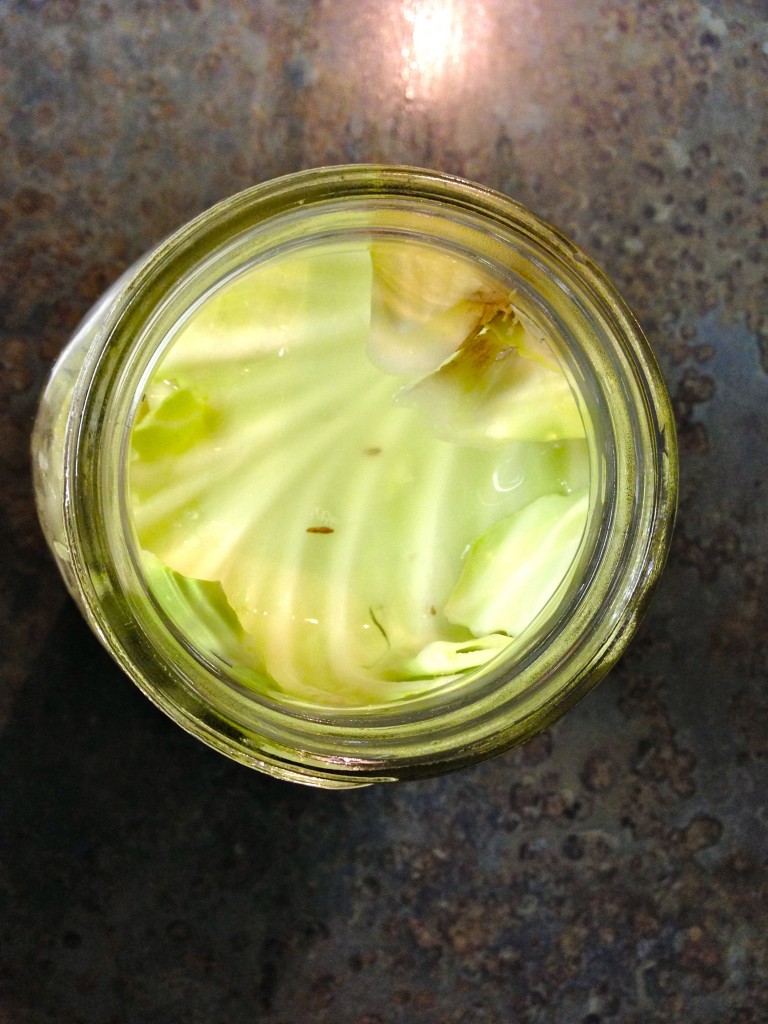
When all of the cabbage is in the jar, use a canning funnel to pour the liquid left in the bowl into the mason jar. Use the leftover cabbage leaf from the beginning of the process to cover the cabbage. Push the leaf down so that the liquid rises above it.

Use a smaller jar or heavy object (thoroughly cleaned and rinsed) that fits inside the larger jar to weigh down the FF-09122014-Kraut5cabbage. I used a small jelly jar that would fit below the large jar’s mouth. You can fill it with cleaned marbles or even rocks, anything to give it weight. Place this smaller jar inside the larger jar, on top of the cabbage, pressing down. Cover the larger jar opening with a cloth tightly secured with a rubber band. This will allow the sauerkraut to breathe while keeping bad things out. Store the jar out of direct sunlight at 65 to 75 degrees.

Every so often — if you’re home, every few hours, or at least a couple of times a day — continue compressing the cabbage by pressing the jar or heavy object down. This will cause the liquid to rise to the top. You’ll notice that the cabbage seems to shrink in size as more liquid is released.

The process may take as little as three days and as much as 10. After three days, taste to determine if more time is needed. At this point, signs of fermentation should be obvious – bubbles will appear at the top and a strong, pungent smell should be present. When it is done to your taste, remove the inner jar, cabbage leaf and cloth. Screw on the top to the jar and store in your fridge.

Sauerkraut can be stored for months, thanks to the fermentation process.

Tagged with: , , , , , , , , , , ,
Posted in In The Red Corner

Project Detox

I’m overweight. Actually—by medical standards—severely obese.

My weight has been up and down since I was a chubby adolescent clad in terrible tie-dye.

I got really heavy in time for sophomore homecoming and had to have a dress made so I could go. Then, two years later, I wore a size ten to my senior prom. Although I avoided the “Freshman 15” in college, in the years that followed, so did the cellulite … and the pounds crept up steadily.

donutThen, when I first moved to Washington, DC., in 2005, I was the thinnest I’d been in years … yet still considered “plus size” as a 16, ironically just above the national average for American females.

Again the weight crept upwards, and though I lost about 50 pounds a few years ago –– I’m right back where I started from. Except not really, because each time I’ve packed the pounds back on, I’ve packed on even more.

When I weighed myself this morning, I’m the heaviest I’ve ever been.

Obesity is something we talk a lot about – but it’s not usually the “fat” person doing the talking. It’s the doctors. The health practitioners. The personal trainers. The “industry.” And they’re talking at us, not to us … or with us.

That’s a big problem when you are a big person: People talk at you, not to you. As much as we avoid looking at ourselves in the mirror, it seems everyone else avoids making eye contact—if they acknowledge us at all. I’ve walked into stores as a “normal” sized person and a heavy person, and I promise you there is a marked difference.

Before you think this is some “woe is me” story, let me assure you: I’m not telling you this so you feel bad for me or anyone else. I’ve made the choices that got me where I am, but I want to share what my experience has been as a big person to give you context.

I don’t fit in chairs properly, be them airline or café. They leave bright red, painful gouge marks on my hips. I actually worry whether chairs or beds will collapse when I sit on them. Clothes shopping? Forget it. As if trying on clothes wasn’t traumatic enough, you get the bonus prize of less than breathable fabrics in some rendition of “tent couture.”

Then there’s the physical pain of back aches, knee aches, plantar fasciitis … and more. You just physically can’t take care of yourself properly. Like shaving. I don’t have good balance as it is, let alone trying to double over on a slick surface with a sharp object in my hand. Even going to the bathroom is a challenge, and one I’ll spare you the details of.

All of this does a number on your self esteem, which is why being a big person is so isolating. You start avoiding people and being in public. You get depressed, and if you’re like me—an emotional eater to the core—it just feeds an endless cycle.

I hit rock bottom when I realized how much my weight was impacting my getting pregnant.

©iStockphoto.com/small_frog

©iStockphoto.com/small_frog

That’s the impetus behind Project Detox. It’s a six-month adventure during which like-minded people will band together to pursue one simple goal: eating healthier.

It doesn’t matter how much you weigh, or whether you want to lose weight at all. This group is about making positive choices and being our best, healthiest selves.  Together, we’ll explore cravings and why we have them, how to give your pantry a whole foods makeover and explore different eating styles, including raw, paleo and gluten-free. We’ll have experts, including nutritionists, holistic health practitioners and personal trainers, join us to share their insights on clean, healthy living. We’ll share what’s working for us, and what isn’t, in a collaborative, confidential and supportive environment.

Best of all, it’s FREE! Will you join us?

Tagged with: , , , , , , , , , , , , , , , , , , , ,
Posted in In The Red Corner

Fire Up The Rice Cooker For Moist, Flaky Fish

IMG_9024I’m not sure why we don’t cook more fish at my house. It’s light, it cooks quickly and doesn’t require a whole lot of fuss to be good. I have plenty of cookbooks filled with what look like wonderful recipes, many of which I’ve marked to try. And yet, I rarely get around to preparing them.

One reason may be that I’ve never been able to gauge when fish is perfectly cooked. Yes, I know the typical advice: “cook until no longer translucent,” or, “until it flakes easily with a fork.”

Well, I must have opacity blindness, because somehow I’ve never looked at a fillet and been able to judge how more or less translucent it is from when I started. And I can tell you, fish that’s cooked too long also flakes easily with a fork. Whoops.

The end result is that I tend to overcook fish far more often than I get it right. Since I’m not too keen on undercooked fish, what generally happens is this: I undercook it, because I’m nervous about drying it out, then put it back on the heat/in the oven and end up with … overcooked, dry fish.

So when I came across an unusual fish preparation method in The Washington Post several years ago, called “Madame SooHoo’s Fish and Rice,” it piqued my curiosity:

“This is a home recipe from Elaine Corn and David SooHoo, owners of Bamboo restaurant in Sacramento, Calif. ‘David’s mother makes a marinated fish that cooks right on top of the rice in the cooker,’ Elaine says.”

IMG_9017In other words, the food steams up all together. Presumably, the idea is to end up with properly cooked fish! (Not to mention easy clean up, too.)

But despite how appealing I found this concept, it’s still taken me almost four years to give the method a try. The problem: no rice cooker. If you read my crockpot bread post, you know that my tiny kitchen has made single-use appliances pretty much verboten at my house. But this month’s theme gave me the perfect opportunity to track down a cooker and give this novel method a whirl.

It took a few days to find a rice cooker to borrow (thank you, Heidi!), but I’m glad I did — while I used a different recipe, tweaked from a favorite stir-fry cookbook (just to give you two different versions to try), I replicated the method and it worked like a charm! The rice was perfectly cooked, and the flavor was rich and not overly fishy. More important: I ended up with moist white fish, perfectly opaque and, dare I say … flaky?

Now, too bad I don’t have a rice cooker, because when I return this baby to Heidi, it’s back to puzzling over what “not-translucent but not-too-opaque” fish looks like …

Five-Spice Rice Cooker Fish

Adapted from Elaine Corn and David SooHoo’s recipe, Madame SooHoo’s Fish and Rice, and a prawn and scallop salad recipe from The Complete Stir-Fry Cookbook (Murdoch books).

1 teaspoon five-spice powderIMG_9027

Pinch of red chili flakes, to taste

2 teaspoons sesame oil

1 tablespoon peanut or corn oil

2 cloves garlic, minced or crushed

1 pound of boneless white fish, cut into approx. 2-inch chunks

1 rice-cooker measuring cup of rice

1 3/4 cup rice cooker measuring cup water

1 tablespoon soy sauce

1 tablespoon lemon juice

1/2 tablespoon mirin

1/2 tablespoon honey

4 scallions, thickly sliced

1/3 cup chopped cilantro, plus more for garnish

Combine five-spice, garlic, chili flakes, sesame oil and peanut oil in a glass bowl or Ziplock. Add fish and toss, cover with plastic wrap (or seal Ziplock) and marinate in refrigerator for up to four hours.

Combine soy sauce, lemon juice, mirin, honey, scallions and cilantro.

Wash and drain the rice several times, until it’s clear. Add washed rice and the water to the cooker, then put the fish on top. Pour the soy sauce mixture over it all, pop the lid on and cook according to your cooker’s directions. When it’s done, let it sit on the “keep warm” setting for 15 minutes. Scoop out into your serving dish, sprinkle with reserved cilantro (and/or chopped chives).


Tagged with: , , , , , , , , , ,
Posted in In The Red Corner
photo credit to Aaron Otis Photography 2014


July
Watermelon is the perfect summer food. It hydrates, it cools, it's sweet and juicy. We have some great ideas for your table, including a salad, ceviche cups, popsicles and cocktails. Get ready to beat the heat with us!