Never Fear Artichokes, The Tastiest Thistles

My mission this week: to make artichokes a little less intimidating. I wish I could tell you I came away from this exercise with some technique that will magically transform these mysterious globes into a fast, after-work kind of dish.

Sorry, gang — that’s not going to happen.

But I was able to test and compare some techniques so you won’t have to. And while I tried only one rather classic preparation — artichokes stuffed with seasoned breadcrumbs — perhaps I’ll demystify these little monsters enough that you can stop giving them a wide berth. Because, while they are a fair amount of effort, they’re well worth the time, if you’ve got it.

The Tastiest Thistle

First, the basics. Artichokes are thistles (it’s true!), with a delicious but well-hidden heart, protected by a fuzzy, inedible “choke.” The delectable hearts are surrounded by leaves of varying tenderness (you’ll find a handy diagram here).

The inner leaves are tender and easy to eat, but become increasingly tough toward the outside of the plant. Only the bottom portion of those tougher outer leaves is soft and edible; that’s the part you scrape against your teeth.

If that seems like a lot of “inedibles,” it is. Most of an artichoke simply can’t be eaten. Accept that you’re going to throw a lot away (not easy for someone who hates wasting food). What you do get to eat is very tasty.

While there is a dizzying array of artichokes available in Europe, you’ll likely see only a few varieties here, known as “globe artichokes.” They also vary widely in size, from the size of a naval orange to a large grapefruit.* Naturally, the larger the artichoke, the longer it takes to cook. Depending on size and how you prepare them (cutting them in half, for example, is much faster than cooking them whole), cooking time can vary from 20 minutes to an hour or more.

If You’re Feeling Artichoke-y …

I only scratch the surface here, but there are some good resources out there for the intrigued. For sheer amazement — and some great-looking recipes — check out theartichokeblog.com. Michael’s been researching artichokes for several years in Italy, where the prickly things are seemingly ubiquitous. The gorgeous varieties and preparations on the blog will blow your mind (Michael’s even stumbled upon artichoke gelato).

Also, Jacques Pepin, my culinary hero, is a master of all things, including the artichoke. I stick with whole artichokes with this post, but he’ll teach an entirely different prep method — paring a raw artichoke down to the heart, leaving the leaves behind — here.
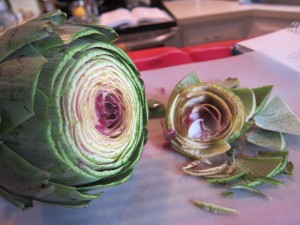
The Easiest Way 

The many ways to cook an artichoke might leave you dizzy. You can steam them whole in a pot or in the oven. You can slice them in half before steaming or roasting them. You can pare them down to their tender hearts.

As promised, I’ll offer up one take —  a classic stuffed artichoke — below. But first, I’ll digress a moment to share what may be the simplest way to prepare an artichoke — my mom’s method: boiled whole, then set in a bowl, to be plucked, leaf by tasty leaf.

Simply cut off the entire stem (so the base will sit flat in your dish), slice off the artichoke’s top, snip the remaining pointy leaf ends with scissors, and boil it in water until you can easily spear it with a knife.

Remove from the water and drain upside down. When you’re ready to eat, pluck the leaves, one by one, and dip in the flavored butter, mayonnaise or aioli of your choice. Eventually, you’ll reveal the tiny tender leaves at the core (these, unlike the outer leaves, are almost entirely edible). Then, scrape away the fuzzy choke and enjoy the delicious heart you’ve worked so hard for.  (See the “Etiquette of Eating Artichokes” section here for more tips).

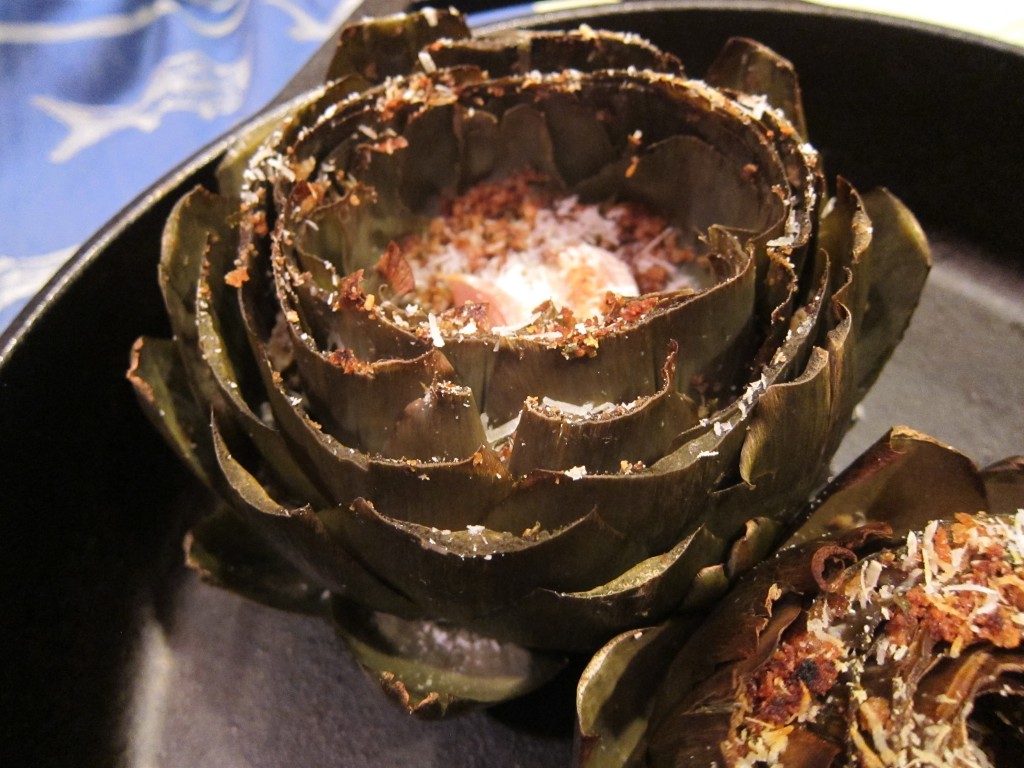
Whole Stuffed Artichokes, Step One: Trimming Now, on to the show! Whole stuffed artichokes, trimmed, prepped and then steamed in the oven. You’ll find the detailed recipe below, but first, we’ll go through some basic techniques.

You’ll need to trim your artichoke to make it easy to work with. For this preparation, you want the artichoke to sit on its base in your dish, so begin by cutting off the entire stem. Then, slice off the artichoke’s top inch or so with a sharp knife, and snip off the pointy leaf ends with scissors. I won’t reinvent the wheel here — this Saveur slideshow breaks it down nicely.

Also, don’t toss out the stems! They’re tender and delicious, as long as you peel the thick outer skin before cooking them.

Step Two: Removing The Choke
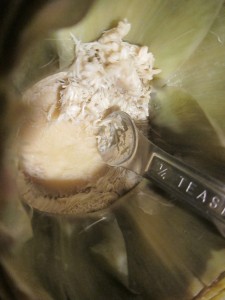
Most stuffed artichoke recipes use one of two techniques to remove the fuzzy choke before stuffing.

Method one: Some recipes direct you to remove the center leaves and scrape out the choke while the vegetable is raw, then stuff and steam.

Method two: Others recommend boiling the whole artichoke until just tender (about 20 to 30 minutes), then removing the center leaves and choke before stuffing.

The first method sounded faster and simpler, but my hero Jacques Pepin recommends the latter. So I compared both techniques above, to save you the trouble.

My verdict: Never doubt the master. Jacques knows what’s up. He wasn’t Charles de Gaulle’s personal chef for nothing. Yes, you can scrape the choke out of a raw artichoke (method one), but removing enough of the center leaves (very firm when raw) to fully expose it is a lot harder than it sounds. And fully removing the choke is virtually impossible without a very sharp-edged spoon (I read a grapefruit spoon helps). I never was able to do the job fully.

On the other hand, boiling the entire artichoke ahead of time (method two), as Jacques recommends, made removing the choke and surrounding leaves a snap. Also, while I had expected method one would save time overall, by skipping the boiling step, it didn’t. Compared to the pre-boiled artichoke, my “method one” artichoke took twice as long to finish cooking in the oven, and was never as tender as its pre-boiled counterpart.

The Final Steps: Stuff And Bake!

One other benefit of the pre-boiling method: you can prepare your bread crumb stuffing while the artichokes are in the pot. Since this step, and those that follow (stuffing and baking), are pretty straightforward, I’ll wrap things up here and refer you to the recipe below.

So, our intrepid eaters, fear not the artichoke! They take some prep, but you can slay these spiky beasts. You’ll be glad you did — they’re well worth the effort.

*You can also find baby artichokes, which are quite wee. These are nice, because they cook up quickly and don’t have the fuzzy choke — meaning you can eat almost the entire thing (with a loss let work!).

Oven-Steamed Stuffed Artichokes

Note about prepping the artichokes: When the artichokes are par-boiled, the center leaves and choke can be removed far more easily than trying to remove them raw. It also yields a more tender finished artichoke.

2 large artichokes (or 3 medium ones)
1 tablespoon butter
2 tablespoons olive oil
1 shallot
2-3 garlic cloves
1 cup breadcrumbs
1/4 cup grated parmesan or other hard cheese
1-2 tablespoons parsley, chopped
1-2 teaspoons herbs of your choice (thyme, oregano, etc.)
salt and pepper to taste

Prepare artichokes for stuffing: Cut the stems off the bottom of the artichokes (so they can sit flat in the pan later) and reserve. Slice off the top inch or so with a sharp knife, and snip the remaining sharp leaf tips off with scissors. Bring a large pot of water to boil and add the artichokes, using a plate or bowl to keep them submerged. Lower the heat to a gentle boil for about 30 minutes. Drain and rinse with cold water, then rinse again.

When they’re cool, gently spread apart the artichoke and pull out the center cone of leaves. It should come out all in one piece. Then gently scrape the center inside down to the smooth choke. If you see symmetrical small dots, you’re not done — keep scraping, but be gentle so as not to cut into the choke. You want the inside bottom to be smooth, not dotted or bumpy. You need a pretty sharp spoon for this, like the edge of a thin metal measuring spoon, or a grapefruit spoon.

Prepare stuffing: Heat butter and oil in skillet on medium-high. Add the shallot, garlic, bread crumbs, herbs (but not the parsley), salt and pepper, and cook for about five minutes until they’re mixed and browned, stirring regularly to prevent burning. Remove from heat and stir in parsley and grated cheese.

Stuff artichokes: Spoon about a tablespoon or two of stuffing into the center cavity, and then gently spread apart the leaves and spoon about a teaspoon or so of stuffing between each leaf. Drizzle each artichoke with two or three tablespoons of olive oil, sprinkle with remaining grated cheese, and set in an appropriately-sized baking dish.

Cook stuffed artichokes: Pour one cup of water into the dish, cover tightly with foil, and bake in a 400-degree oven until a leaf can be pulled out easily, and/or you can easily pierce the artichoke base with a knife (this can take anywhere from 40 minutes to an hour and 15 minutes, depending on the artichokes’ size.

Tagged with: , , ,
Posted in Dear Diary

Chef Rock Harper On Building Your Kids’ Lunchbox (And Yours)

Unless you’re counting my incredibly adorable and perpetual sidekick Pomeranian, Sake – I don’t have kids. So when it comes to packing a lunch I would eat that would also make a half-pint smile, I was a bit perplexed.
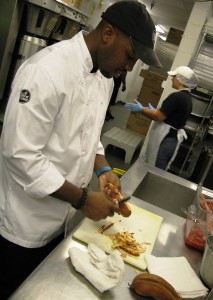
Sure, I make a mean PB & J. But aside from rather cliché hotdogs and chicken fingers, I’m unsure what kids will put up with. And how about a little nutritional value? Even Sake eats strawberries and most vegetables, so I’d like to think I could give a kid anything, too. But that’s an idea that usually draws gales of laughter from my parenting friends.

Time to call in the cavalry.

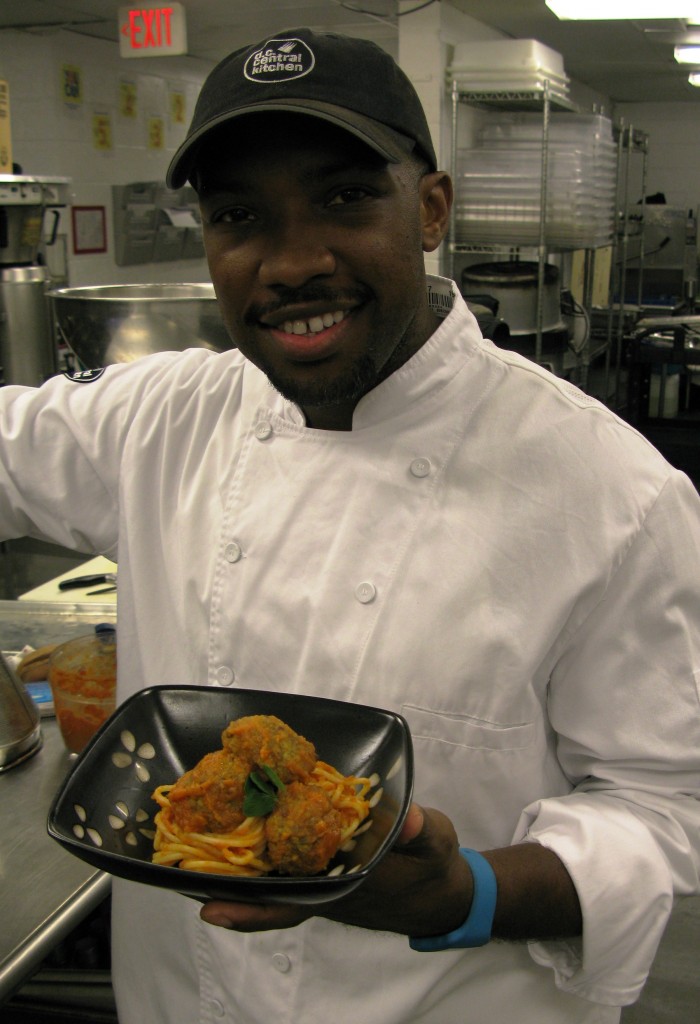
Enter Rahman “Rock” Harper, third-season winner of Fox TV’s Hell’s Kitchen and director of kitchen operations at D.C. Central Kitchen, where we’re cooking together today. But it’s his other role — perhaps his most important — that drew me here: “Chef Rock” is dad to Elijah, Leah and Jaiden — 12, 9 and 2, respectively. Oh, and he’s written a book on the subject (check out a video about that, here.)

A chef with a trio of picky palates to feed? I’d say that pretty much makes him  an expert on the subject of what kids will — and won’t — eat.

Three Strategies

Rock agrees. He says he’s learned a lot as a father. But even he admits, with a full-time job and family life, getting his brood to eat well can be a challenge. He tackles it with a three-prong approach.

First, he says, don’t ruin their taste buds. I cock my head to the side. What does that mean?

“Once they eat regular stuff — chicken fingers, spaghetti and meatballs, hotdogs — their palates are altered,” Rock says, dicing sweet potato, green pepper and onions.

Flavor, he says, is what tastes good. Salt, fat and sugar all fall into that category, and when kids get accustomed to those flavors, they start to recognize and expect sodium and fats. Other things — like a simple, grilled chicken — begin to taste flavorless. Now, there’s nothing wrong with crispy, or with sugar, he adds. But it should be in the context of a full, balanced meal. His suggestion: start kids young — the younger the better — and keep them eating a variety of foods.

While some parents try hiding nutrition in something tastier, Rock says that approach isn’t helping anybody. Kids grow up thinking they hate cauliflower, he says, only to find you’ve been sneaking it into their food for years. Rock is into full disclosure.

“I’m not really a sneaky chef — I’m not like that. Tell them after they taste it and say it’s good.”

As he pours a Ziploc bag of bright red tomato sauce (you can try this one from WTE) into a pot on the stove, Rock says the key is to experiment, experiment, experiment. Talk about food with your kids, ask for their feedback and be open to hearing it. If you’re not, they’ll just throw it away and never tell you, he says.

“They’re not going to like everything. You can’t take it personally.” But, he concedes, laughing, “It hurts. Sometimes the kids are just mean.”

Chef Rock says you can turn that thumbs down around with his second strategy: Get the kids into the kitchen early — the earlier, the better. With two-year-old Jaiden, that might mean making an apple pie. Wash the apples together and offer a taste. Then sprinkle flour in their hands and give them dough to play with. Play pat-a-cake. Do this, Rock says, and the kitchen won’t be so foreign when they are 4 or 5. And with kids this young, don’t forget the most important ingredient: Patience.

“They’re going to make a mess,” Rock says. “Let them have fun with the food. Food is about texture and smell.”

Finding tasks for nine-year-old Leah is a bit easier than for her younger brother. And like her daddy, she loves to cook. Her reading skills are excellent, Rock says, so she can retrieve items for a recipe herself. Leah’s also good at counting measures — like bringing three apples to the counter — and helping with basic prep like stirring and rolling. Rock says you can even help a child of this age use basic kitchen equipment, like a mixer, if you feel comfortable.

Rock expects a lot more out of his eldest, Elijah.

“You’re talking to a chef,” he jokes. “My 12-year-old should be able to debone a turkey by now!”

Rock uses his kid’s strengths in the kitchen. Since Elijah likes math, he gets assigned lots of measuring. He also enjoys figuring out how to cut a recipe in half. He cracks eggs and cuts softer things with a butter knife, and, because he also likes to direct, Rock lets Elijah guide him through recipes in the kitchen.

“He’s a control freak. I don’t know where he gets it from,” grins Rock, who admits that giving up control in the kitchen is a real challenge. “As a chef, I don’t want anyone in the kitchen with me when I’m focused,” he says.

What he means by anyone is anyone incompetent. And while a screaming 9-year-old isn’t necessarily competent, says Rock, for the most part, the kids are really engaged when they cook. They like being able to say, ‘I made this.’

On that note, Rock reveals his third tactic.  He calls it, “one of the best ideas I’ve come up with.”

His kids make dinner.

I nearly drop my pen in the lentils he’s simmering on the stove.

It’s true. Both Elijah and Leah each make dinner one night a week. Leah whips up mac ‘n cheese on Wednesdays, while Elijah makes spaghetti and meatballs on Sundays, Rock says, dropping a handful of pasta himself into a waiting pot of boiling water. That makes two meals and two nights of leftovers. Add in the family’s “breakfast for dinner” night, and he’s only cooking two nights a week.

Even a childless person can recognize brilliance when they hear it.

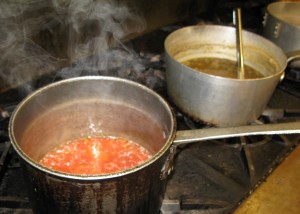
Rock ladles some lentils out of the pot, drains them, and puts them in the fridge to cool slightly. Then it’s back to the sauce simmering on the stove.  For added nutrition, Rock has added those diced sweet potatoes, onions and green peppers to the pot, and the smell of the steaming sauce is beginning to make my taste buds do cartwheels. Rock explains that he’ll puree it all later, since unrecognizable chunks can mean mutiny in his household. “Down goes Daddy,” he laughs.

Making Lunch Fun

As he expertly rolls his lentil concoction into small spheres, Rock offers more ideas for building good kids’ lunches.

Include small components, Rock says, so kids can mix and match. Think homemade Lunchables: Pack small pita chips you toast yourself — or whole wheat crackers if time is tight — with a good quality cheese and meat. Chips and dip. Do-it-yourself sandwich wraps.

Rock pulls his now-beautifully browned lentil meatballs from the oven and offers me a delicious bite. 

You want to make kids’ lunches fun, he says. Crudite doesn’t necessarily fit in the “fun” category, but if you create fun shapes with a cookie cutter, it can. I mean, who doesn’t like crispy little shoestring carrots or cheddar in the shape of a star?

Too often, adults don’t think creatively, Rock says. “We’re sticks in the mud. [But] kids have fun with their food.”

He also suggests using fun names, like “Leah’s Cheesy Meatballs.” (Makes total sense — “Lentil Meatballs” doesn’t sound particularly yummy to me, either.) Make “Carrot Coins” with carrots to dip in hummus, or “Ninjago Nuggets” with baked chicken tenders you bread with panko crumbs.

But, Rock warns, don’t surprise the kids at lunchtime or you are going to lose. Test the new eats out beforehand.

If they still want chicken fingers and pizza, Rock says, educate them on what will happen if they eat that all the time. Then challenge them to work together with you to come up with a healthier, tasty version.

“You gotta give them what they like,” he says. But, he adds, what they want, and what you want them to eat, can meet halfway. Wheat bread or a mini pita with some homemade sauce (or a nutritious, store-bought version), and a flavorful, healthy cheese, can put a smile on both of your faces, he says.

Believe me … these lentils put a smile on mine. Adult-tested, kid-approved? Let us know, and try a few more recipes from Chef Rock below.

Many thanks to the DCCK team, and especially Chef Rock, for inviting We The Eaters into your kitchen. We are so grateful to Rock for sharing the recipes below with our readers. You can find his book — 44 Things Parents Should Know About Healthy Cooking for Kidshere.

Chef Rock’s Lentil Meatballs with Spaghetti & Tomato Sauce

Serves 8

2 cups lentils
1/4 cup plus 2 tablespoons olive oil
1 large onion, chopped
2 carrots, chopped
2 celery stalks, chopped
1 garlic clove, minced
1 tablespoon chopped fresh thyme
2 teaspoons salt
3 large eggs
1/2 cup grated Parmesan cheese
1/2 cup bread crumbs
1/2 cup chopped fresh parsley
Cooked spaghetti
2 cups tomato sauce

Combine the lentils, a pinch each of salt and pepper, and 2 quarts water in a pot and bring to a boil over high heat. Reduce heat to low and simmer until the lentils are soft, about 30 minutes. Drain the lentils and allow to cool.

Add 1/4 cup of the olive oil to a large frying pan and sauté the onions, carrots, celery, garlic, thyme and salt over medium-high heat, stirring frequently, for about 10 minutes, until the vegetables are tender and just beginning to brown. Transfer the mixture to a large bowl and allow to cool to room temperature. When cool, add the lentils to the vegetable mixture.

Add the eggs, Parmesan, bread crumbs and parsley to the cooled vegetable mixture and mix by hand until thoroughly incorporated. Place in the refrigerator for 25 minutes.

Preheat the oven to 400°F.

Drizzle the remaining 2 tablespoons olive oil into a 9×13-inch baking dish and use your hand to evenly coat the entire surface. Set aside.

Roll the mixture into round, golf ball-size meatballs (about 1 1/2 inches), making sure to pack the vegetable mixture firmly. Place the balls in the prepared baking dish, allowing 1/4-inch of space between them. Place in even rows vertically and horizontally to form a grid.

Roast for 30 minutes, or until the meatballs are firm and cooked through.

Allow the meatballs to rest for 5 minutes in the baking dish before serving with your favorite pasta and sauce.

Chef Rock’s Chocolate Milk Mix

1/2 cup cocoa powder
1/2 to 3/4 cup sweetener (agave nectar, turbinado sugar, honey, sugar cane juice, brown rice syrup)
1 cup water

Mix all ingredients, boil for a minute and cool. Add to milk and that’s it!

Chef Rock’s Homemade Applesauce

4 pounds peeled, cored and quartered apples.
4 strips lemon peel — use a vegetable peeler to strip 4 lengths
Juice of one lemon (about 3-4 tablespoons)
1 teaspoon cinnamon
1/4 cup dark brown sugar, packed *ONLY if you have apples that aren’t sweet!*
1/2 cup water
1/2 teaspoon salt

Put all ingredients into a large pot. Cover and bring to boil. Lower heat and simmer for 20 to 30 minutes.

Remove from heat. Remove cinnamon sticks and lemon peel. Mash with potato masher or run through a food mill.

Ready to serve hot or you can chill and enjoy later.


Recipes for chocolate milk and applesauce from Chef Rock’s book,
44 Things Parents Should Know About Healthy Cooking for Kids, reprinted here with his permission.


Tagged with: , , , , , , , , , , ,
Posted in Dear Diary

Meet The Chef: Rahman “Rock” Harper

D.C. Central Kitchen (DCCK) prepares 5,000 meals a day. A day. With  just more than a dozen employees, and dozens more volunteers, these meals are served on-site or delivered to homeless shelters, rehabilitation clinics and kids programs throughout the city.

The man who makes sure all this magic happens is Chef Rahman “Rock” Harper, whom some of you may know better as the winner of the third season of the Fox TV program Hell’s Kitchen.

“It’s my job to make sure we’re doing what we’re supposed to be doing … better, and more efficiently,” says Rock.

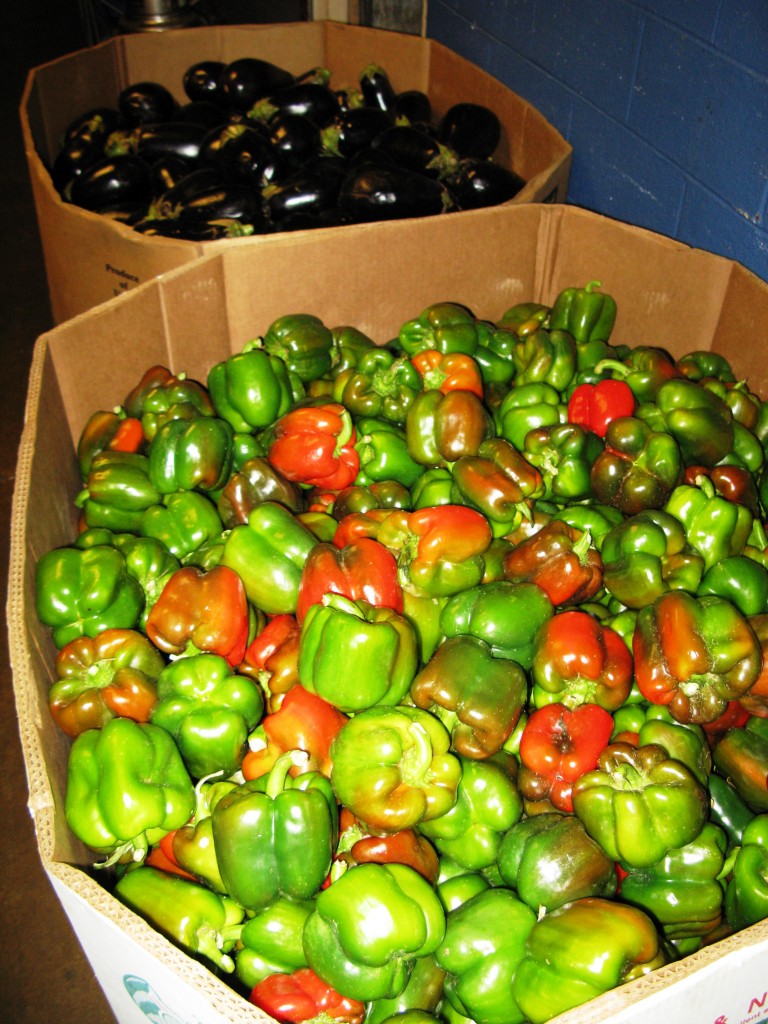
And in the DCCK environment, that’s critical. I mean, what does one do with a pallet full of green peppers and eggplant? Much of what comes in is donated, so it’s not like ordering food for a restaurant. So you make those donations work, says Rock. Which means you’ve got to be prepared — and creative.

“I have no idea how it looks or how it’s going to be,” Rock says. “I have to make use of [what comes in] every day.”

The peppers are easy, he says, but sometimes a donated product can be completely random. Like 100 pounds of purple basil. The amount that gets added to sauce and soups only makes a dent, so Rock preserves the rest or makes flavored oils.

It’s this resourcefulness that landed him the spot on Hell’s Kitchen in the first place. He was working as the executive chef at D.C.’s B. Smiths when he decided he needed a change.

“I’d reached a certain level and I was plateauing,” says Rock. “I felt like I had to do something radical — I’m a radical dude.”

The Hell’s Kitchen producers later told him they weren’t wowed by the guy who showed up at the New York audition, dressed in slacks and a nice shirt. When they asked him why he wanted to be on the show, he said, “Because I’m going to win.”

Even now, he cringes a bit at the thought. He says he was sure he’d botched it when they said “we’ll call you.” He didn’t wait for the phone to ring. He went to another casting — Atlanta, this time — clad in jeans and a t-shirt. He laughs, remembering the other applicants he sat between: the manager at a Red Lobster and a ventriloquist wearing a kilt.

“Black guy in the middle? I’m gonna stand out!” he laughs.

He seems surprised when I ask him to share the one question he’s never asked about being on the show, dominated by chef Gordon Ramsay, a man not known for being calm and collected. Rock says people mostly want to know about the drama.

“Nobody really asks about the cooking,” he says. “I didn’t think it would be as hard as it was.” Describing how hard Ramsay works in the kitchen, Rock says the chef is in amazing shape to be doing what he does. It was that work ethic that Rock took away from the show.

“If you keep working hard at whatever it is you do — and you keep believing — you will have success,” Rock says. “You just have to expect greatness from yourself.”

These days, greatness comes in the form of serving others at DCCK. Rock was teaching at Stratford University in Woodbridge, Va., when the position came open. He felt he was young enough that he could take some time in his career to give back by working for a nonprofit.

“I love challenges. I love people. This place is about the people — how we can change lives through the power of food.”

And a challenge it is. Cooking thousands of meals a day for people who don’t get to choose what they’re eating can be incredibly trying. But Rock takes it all in stride, musing about the possibility of one day making enough fried chicken to serve at least the onsite residential program. It’s one of the most requested items from the homeless people the kitchen serves, Rock says.

That’s not to say that his “customers” aren’t happy with Rock’s meals. There are plenty of thanks and compliments. Rock says it’s the moments when someone names a specific meal, like thanking him for “that gumbo you did like my mother used to make,” that really stand out.

But as much as he appreciates doing what he’s doing here at DCCK, he says don’t worry: He’s a restaurant chef at heart, and he’ll be back there soon.

Chef Rock, we can hardly wait.

Chef Rock’s Tips for Eaters: What Every Kitchen Needs

  1. A good, sharp knife. “Spend a little money,” he says. You can get a good one for anywhere from $50 to $200. Then, keep it sharp. Rock’s favorites? Wusthof or Henckels.
  2. A cast iron skillet, Rock’s “all-purpose pan.” They conduct and retain heat well, are inexpensive and last forever.
  3. A pepper mill. He looks really serious about this one, and I agree: it tastes much better when you grind your own.
  4. A wooden spoon. Rock says they’re incredibly versatile, since you can use them on a Teflon surface and they won’t impart a metal taste to foods when you are sampling.

“I could take over the world with  those four things,” says Chef Rock. “It’s on my to do list!”

Tagged with: , , , , , , , ,
Posted in Dear Diary, Meet the Chef
photo credit to Aaron Otis Photography 2014


July
Watermelon is the perfect summer food. It hydrates, it cools, it's sweet and juicy. We have some great ideas for your table, including a salad, ceviche cups, popsicles and cocktails. Get ready to beat the heat with us!