

- All photographs, including this and the featured image, were taken by Wilhelm A. Hesse for We The Eaters, courtesy of Stacey Wiessbock.
That’s me—granddaughter of a butcher, not a baker. Not a candlestick maker. I hate baking. In fact, I quite often suck at it.
So when I was invited to write for you all, about a sweet amuse-bouches, my first instinct was to ask for something more in my wheelhouse. But as I teach people and companies to embrace their fears and change for a living, it occurred to me that if I can do this—anyone can! And I do have my baking moments, like with my challah, the random tart and banana bread… or when I’m creating treats for my annual holiday party, which is always an amuse-bouche themed event.
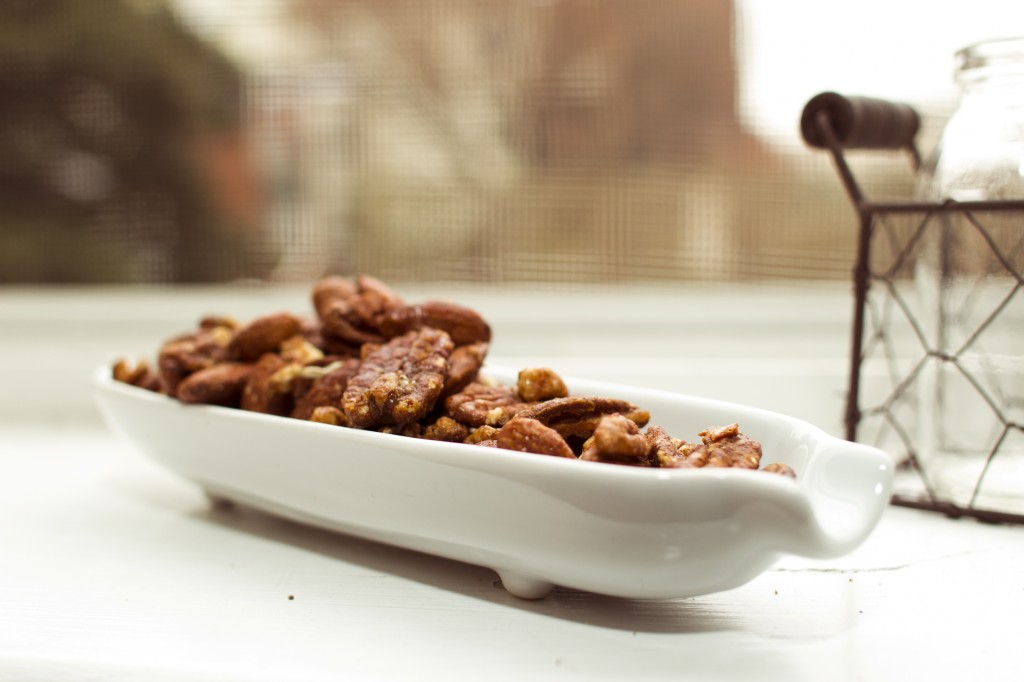
As you’ve been reading this month on WTE, an amuse-bouche is a single, bite-sized hors d’œuvre. All of the recipes I share here can be eaten without forks and presented as single-serve items. For space sake, as I expected 40 to 50 people, I presented mine in larger containers, as you can see by the photographs. You could easily serve smaller portions, with nuts in tiny parchment paper cones or eggnog in shot glasses.
Preparations for my party begin in October. I cannot function in chaos and I loathe wasting time. In 2008, I opened Nationals Park as Director of Catering & Special Events, so being organized and planning is kind of in my DNA. I own a label maker and use it regularly. My first step for any event is to grab a small binder to keep all relevant info handy and in one place. I will put a copy of the invitation on the front of the binder. Inside, I create an overview of the upcoming event with tabs for a day-of timeline, a calendar of the month that the event will occur, a shopping list, a free form ideas page, a phone list (helpful if anything is being delivered or if others are participating in making things), a menu or recipes tab, and, if necessary, a table or floor plan section. I am almost always working alone, but if for some reason multiple people are involved, everyone should have the exact same binder and constantly be sharing and updating their binder info. Sharing information and communicating means less stress, and that even the tiniest details will be executed brilliantly!
Here are a few of my tips for “sweet” success:
- Multiple boxes of parchment are a new baker’s best friend.
- Before the day of the event, set aside 30 minutes to really read your recipes. Don’t wait until you walk into the kitchen to bake. That way, if you have any concerns or questions you can call a trusted baking lifeguard for assistance.
- Be sure to lay out your plan and equipment and have all the items your recipe calls for at the ready. It insures a smooth process from beginning to end!
- I love that I can tell Siri (iPhone’s “personal assistant“) to set timer for 20 minutes and completely fo-get-abot-it… because I always do. And instead of reaching into the oven a failure, she sets me up to succeed!
- Remember—if it is just awful, no one will know except you. Throw it away and try it again a different day. Noone is perfect, despite Martha’s best efforts to convince us otherwise.
- Finally: The greatest reward is one earned. I for one am beaming over what I accomplished here, and will be over the moon, if others can find success on my path as well!
For this event, my next step was plotting out my shopping list and what items I would tackle each day. Tackling a project like this seems less scary and daunting when laid out on the calendar, with the estimated time for each activity and mixed in with the rest your life!
As I always say: Lead with what you know and the rest will follow. I have been making the nuts for years at the holidays, so I tackled those first. Ironically, I don’t actually EAT these, and last year, I changed recipes. People noticed a change but couldn’t put a finger on it exactly. This publication of the recipe will enlighten! The old recipe was great but as I mentioned, it is my nature, both personal and professional, to seek change. So I tweaked it, as with all the recipes here. I believe when you are in the kitchen, you should always make what you are cooking your own. Why else are you making it? Just for the shear joy on everyone’s face? HA!
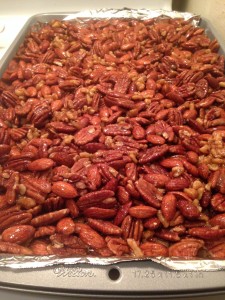
Stacey’s Sweet & Spicy Nuts
Adapted from foodandwine.com.
4 cups nuts (recipe calls for almons and cashews, I use whatever is on hand)
2 large egg whites
1/4 cup of brown sugar
3/4 cup of granulated sugar
1 tablespoon of kosher salt
1 tablespoon chile powder
2 1/2 tablespoons of Chinese five spice
2 1/2 teaspoons cayenne pepperPreheat oven to 300 degrees and line a large baking sheet with parchment. In a large bowl, whisk egg whites until frothy. Combine egg whites and nuts, tossing thoroughly so all nuts are coated.
In a small bowl, mix sugars, salt and other dry ingredients. Add sugar/spice mixture and continue to toss until nuts are evenly coated.
Spread out on baking sheet. Bake for 20 minutes. I recommend that you turn pan in oven, after 10 and stir nuts so they bake & brown evenly, on both sides. Previously I have on occasion noticed some burning due to a high concentration of sugar. Return to oven to bake for additional 20-25 minutes.
Let cool on baking sheet away from stove. When comfortable to touch, use hands to break up and separate. If you wait, it can be a challenge to break apart evenly.
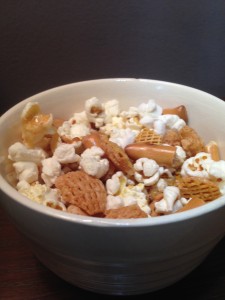
Next I tackled The Popcorn Crack, a recipe from good friend, Kate Gorscak. I should note that it took about 20 minutes prep time, and you can do lots of other things while this is baking for an hour. This has never lasted in my house longer than 2 days, so I cannot attest to a shelf life!
Popcorn Crack
Adapted from Kate Gorschak’s recipe from her blog, Small Girl, Big Appetite.
Mix:
9 cups plain popcorn. (I pop mine on the stove top because I refuse to own a microwave, but as KG notes, you can use microwave bags.)
1 bag plain pretzels, broken into small pieces (I prefer whatever is least expensive, plain and whole wheat)
3 cups Crispix cereal
Any nuts in my freezer (I happened to have some sliced almonds that I toasted)Coating:
1 stick margarine
1 cup white sugar
1/4 cup white Karo syrup
1/4 teaspoon of baking soda
1/2 teaspoon of vanillaLine a large roasting pan with parchment paper. Combine all dry ingredients and add to the pan.
Using a small sauce pan combine the first three coating ingredients (margarine, sugar and syrup.) DO NOT STIR. Bring to a boil. At 5 minutes, remove from heat & quickly stir in baking soda and vanilla. Immediately pour over dry mix in roasting pan.
Bake at 250 for 1 hour, stirring every 15 minutes.
WARNING: it will burn your tongue, if you do not let it cool!

An amuse bouche in the form of a beverage? Ode to joy! This South American Eggnog is incredibly rich with a fantastic twist: pureed peaches & vanilla rum! (A short cut note: if you don’t want to buy canned peaches or don’t have any fresh available, baby food peaches are a great substitute!) I happened to have 2 pounds of left over summer peaches in the freezer, which I thawed and slow roasted in the oven. I put half aside for my eggnog and the remainder for my 16-hour Peach Bourbon BBQ ribs (I’ll save that recipe is for another time!)
Once cooled, I picked out the skins and pureed the peaches with a hand blender. It was very thick and made the eggnog a darker color. I admit, if I had just pureed the peaches after thawing them, I might have liked the lighter flavor better in the eggnog. Something to try for next time!
I tested both making eggnog from scratch and using store bought. Sadly, it made no difference in this recipe, so save yourself time and buy it.
Stacey’s Twisty South American Eggnog
2 gallons of store bought eggnog
1 quart half & half
2 cups (1 pound) peaches, pureed
2-3 tablespoons of Chinese five spice (add more or less to your taste)
1/2 to a whole bottle of vanilla rum (add more or less to your taste)Mix well and let sit in refrigerator overnight. Shake well and serve cold.
I tasted after 18 hours and felt that everything was pretty balanced but we all have different palates– so make it your own!
Marshmallows? Yes, but not those tiny-melt-too-fast pellet-looking things. We’re talking grown up, white pillowy islands floating in a warm cup of hot chocolate. But wait—there’s more! Lavender, vanilla and almond… yes, three flavors. I seemed to get more confident as the sugar flowed and the sweet smell of success wafted from my kitchen. Why not just make a few flavors instead of just one? These mallows are beautifully puffy, remarkably simple and ridiculously decadent—in a cup, on a stick or on their own!
Stacey’s 1, 2 & 3 Marshmallows
Adapted from Smitten Kitchen, June 2009.
3 1/2 envelopes (2 tablespoons plus 2 1/2 teaspoons) unflavored gelatin
1/2 cup cold water
1/2 cup cold water
1/2 cup light corn syrup
2 cups granulated sugar
1/4 teaspoon salt
6 large egg whites
1 tablespoon vanilla (alternately: 2 tablespoons lavender simple syrup, or 2 teaspoons almond extract)
1/2 cup confectioners’ sugar
food coloring for tinting (optional)Oil bottom and sides of three 8-inch square metal baking pans. Dust sides
and bottom with confectioner’s sugar. As I’ve said—this is not my wheelhouse, so I was worried I might screw something up. Rather than stress, I labeled each of the pans and the 3 egg white bowls with the different flavors I was making.
Add gelatin to 1/2 cup cold water in the bowl of the stand mixer and let stand to soften.
In a 3-quart heavy saucepan cook 1/2 cup of cold water, the granulated sugar, corn syrup and salt over low heat. Stir with a wooden spoon until sugar is dissolved. Increase heat to medium and boil without stirring, until a candy or digital thermometer registers 240°F- about 12 minutes.
Remove pan from heat and pour sugar mixture into the gelatin mixture, stirring until gelatin is dissolved. Beat the mixture on high speed until white, thick and nearly tripled in volume—about ix to eight minutes. Using a plastic spatula, draw lines in the bowl to segment into thirds for of each of your flavors.With clean beaters, beat two egg whites, the flavoring and food coloring (if desired) in three separate medium-sized bowls until they just hold stiff peaks.
With cleaned beaters, beat 2 egg whites, the flavoring & food coloring(if desired), in the corresponding medium bowl, until they just hold stiff peaks.
Add 1/3 of the sugar mixture and whisk it into one of the egg white bowls until combined. Pour mixture into one of the baking pans. It may not all come out of the bowl—that’s okay. Spread evenly with spatula sprayed with cooking spray (prevents sticking) and sift 1/4 cup confectioners sugar evenly over the top. Repeat with remaining two bowls and pans. Chill marshmallow, uncovered, until firm. (Honestly? I let it sit overnight because, while it took just a little over an hour, I had mentally spent enough time in the Land of Sweets! All I wanted to do was clean up and eat dinner. The next morning, I did wake up excited to finish these.)
Run a thin knife around edges of pan and turn over onto a large cutting board. Tip one corner of the pan up. With a finger, loosen marshmallow block and ease out onto cutting board. Trim edges of marshmallow and cut into cubes (agian, spray your knife with cooking spray or use an oiled pizza cutter.)
Sift 1/4 cup of confectioners’ sugar back into the empty baking pan and roll the marshmallows through it, coating all sides, before shaking off the excess and packing them away. Supposedly, these marshmallows keep in an airtight container at cool room temperature for one week. If we hadn’t eaten them all two days before the party, these would have been served on the hot beverage bar.
As I mentioned at the beginning of this little adventure: I truly believe if I can do this with success, anyone can! And don’t forget, that in all things—especially in cooking and baking—you should never be embarrassed or too proud to share your errors or challenges. That’s how we learn. Personally I would rather participate in life and fail, than sit by the window and watch the world go by.
“It is common sense to take a method and try it. If it fails, admit it frankly and try another. But above all, try something.”
― Franklin D. Roosevelt, Looking Forward
All photographs, including the featured image, were taken by Wilhelm A. Hesse for We The Eaters, courtesy of Stacey Wiessbock.


Excellent recipes! Bob and I have created savory amuse-bouche, but never thought of the sweet. We look forward to your next set of delicious ideas. Happy New Year Stacey!
I love your article! So proud of you! By the way…I am an addict for your nut recipe. They are soooooo good!
love, mom