 This recipe is the easiest, and possibly the most delicious, of the three; it’s certainly the most unique. Kranzbrot directly translates to “wreath bread,” but between the Internet (which yields exactly zero recipes for this goodie!) and my mom recounting how she got the recipe, my best guess is that it is a variation on Osterzopf, the sweet bread Germans make for Easter.
The ingredients and braided form of the two breads are very simliar, but, ironically, for Osterzopf, the braid is circled up into a wreath while we leave kranzbrot in straight braided loaves. Online descriptions of Osterzopf tell me it is perhaps more airy, like a brioche, while kranzbrot is a denser bread.
Our kranzbrot recipe comes from my great grandfather Ahne’s side of the family. They always made it at Christmas, sometimes with dried cherries (the little German village he is from is full of cherry trees!).
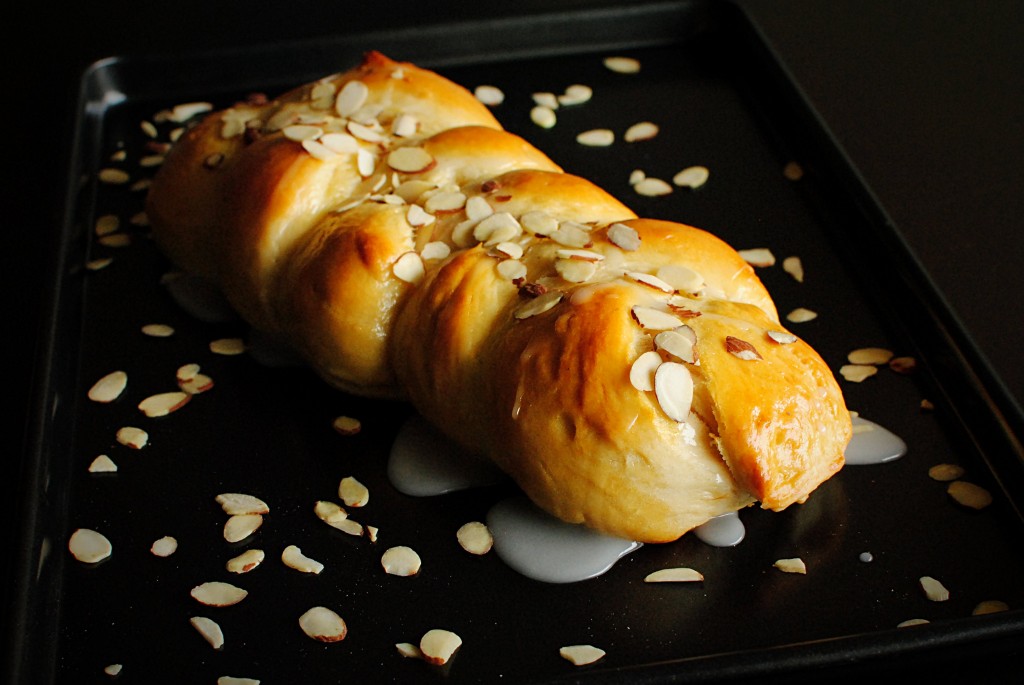
My mom took the liberty of adding the vanilla, lemon and almond extracts to the family recipe. It was also her idea to drizzle a powdered sugar glaze over the top, and to sometimes garnish the bread with green and red candied cherries, cut and positioned to appear like little holly berries and leaves, for a more festive look. I keep my toppings simple – just the glaze and sliced almonds – but the extracts are key. As soon as I added them to the dough, my boyfriend exclaimed from the next room (where he was preparing to take the lovely photographs you see), “Smells like Christmas!”
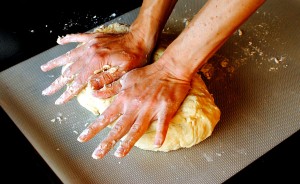
I like to make two larger loaves (a slice of the little one is sometimes barely a bite!), but if you’re looking for great holiday give-outs, you can also make four smaller loaves (or double the recipe for eight) to give to your neighbors, coworkers, friends, whoever! Braiding the bread is the most fun part for me, but I learned the hard way that tugging on the ropes to make a tighter braid (prettier when it’s dough!) also results in more tearing in the bread when it bakes. So, while the bread won’t holler for you not to pull so hard, don’t!
Kranzbrot
Recipe courtesy of Katie Strunk
After you braid, but before putting the loaves in the oven, make sure to get into all the nooks and crannies of the braids when brushing them with the egg wash. Also, don’t be afraid to experiment with the consistency of the glaze. I found the best method was to throw the powdered sugar in a bowl and then add water, little by little, until I had an opaque glaze that was just thin enough to drizzle.
For the bread:
1 cup butter
1 1/2 cup milk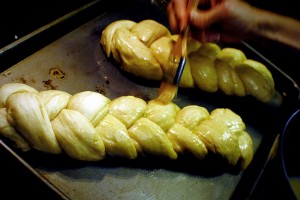
1 package yeast (7 grams or 1/4 ounces)
3/4 cup sugar
6 to 7 cups flour
2 eggs
1 teaspoon vanilla
1/2 teaspoon lemon
1/2 teaspoon almond
For the egg wash:
1 egg
1 teaspoon water
For the glaze and garnish:
1/2 to 1 cup powdered sugar
Enough water to create glaze consistency
Toasted almond slices
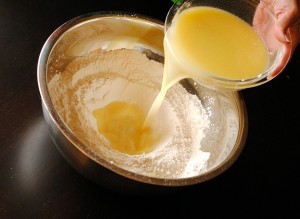
Reserve approximately 2 ounces milk for dissolving the yeast. Put remainder of milk and butter in glass bowl or large Pyrex measuring cup and melt in microwave for 1 to 2 minutes on high, pausing in the middle to stir and break apart butter (small remaining chunks of butter will melt as the mixture cools). When melted, add sugar and stir. Allow to cool to room temperature.
Dissolve yeast in lukewarm milk with a pinch of sugar or salt (to activate the yeast).
Place 3 cups flour in a large bowl and make a well in the center. Stir together milk mixtures, pour into center of the “well” and mix into flour to create a dough.
In a separate bowl, beat eggs and stir in vanilla, lemon and almond extracts. Mix well into the dough.
Knead in remaining flour until dough feels firm and no longer sticky, just a minute or two. Do not over-knead or you’ll make the dough dry. Let rise until it has doubled in size (45 to 60 minutes).
Once dough has risen, preheat oven to 350.
Punch dough down. Knead for just a few minutes and divide into two (for large loaves) or four (for smaller loaves) sections. Divide those into three sections each, roll each into 10- to 12-inch ropes, then braid. Tuck ends under braided loaves and place on well-greased cookie sheets.
 Beat egg and water together. Brush loaves with egg wash, making sure to get it in all the crevices of the braid. Bake 15 minutes, brush with egg wash again and bake for another 15 to 20 minutes or until golden and springy to the touch. Remove from oven and let cool.
To make the glaze, add water, little by little, to powdered sugar until you have a white glaze. Add a dash of lemon or vanilla, if desired.
Drizzle glaze back and forth in a zigzag pattern over loaf. Garnish with toasted almond slices. Allow bread to cool, then slice and enjoy!
To save for future use, wait until bread has totally cooled, wrap in plastic wrap and then aluminum foil. May be frozen for many weeks if wrapped loaves are placed in airtight plastic bags.


 I have to admit, I’ve never really eaten pumpkin butter before. Pumpkin pie – yes. Pumpkin spice latte – yes, just the other day. Pumpkin beer – oh hell yes. It sounds amazing. I love pumpkin. And I love butter. It’s almost a better union than peanut butter and chocolate (almost).
 Traditionally, the filling is made from canned pumpkin and spices, such as cinnamon and nutmeg. This recipe still includes all of the ingredients, replacing the canned with fresh of course. While the canned is definitely a “shortcut”, I have to admit that roasting and pureeing my own is so much more fulfilling. It’s really not that hard! And it can be done days ahead of time. The hardest part was cutting the pumpkin — just make sure you use a sharp knife. While I didn’t follow the recipe exactly, I found Oh She Glows’s
  Pre-heat oven to 350 degrees. Before roasting, prep your sugar pumpkin. Ensure your knife is freshly sharpened. The rind is quite tough! Cut the top off to remove the rough stem, then cut in half. Remove the seeds and stringy pulp using a spoon. Note, don’t forget to set aside the seeds for