

 Pronounced KEEN-wah, this little grain is one of the tiniest heroes amidst the healthy buzz words you may have hears about over the past few years. But here’s our tip this week: You can make this power-packed super grain even healthier. How, you ask? By sprouting it, of course!
Let me back up.
Quinoa is indeed one of the healthiest grains you can eat, and one of the only plant foods considered a complete protein. It’s high in fiber, has a low glycemic index, is full of minerals and it’s gluten free.
Plus, you can add it to virtually any meal—even breakfast. In fact, the protein and fiber make it a great addition to your morning routine because it will keep you full longer than the basic cereal you’ve been munching. Or add it to some homemade granola. There are so many great ways to incorporate it before noon: Add it to your bread and pancakes, or to a hearty oatmeal or quiche. As my mother always says, breakfast is the most important meal of the day (and evidence points to this early meal as essential for weight loss.)
Think quinoa is boring? Try sprouting it. As discussed last week, sprouting breaks down phytic acid, making seeds and grains easier to digest. It’s easy, cheap and low maintenance. You can pretty much set it and forget it. Quinoa is also one of the quickest grains to sprout: You’ll have usable sprouts within 24-36 hours, with little tails springing forth virtually overnight.
For a great resource, consult The Sprouting Book by Ann Wigmore or this one by Rita Galchus on Homegrown Sprouts.
 Sprouted quinoa can be swapped for non-sprouted quinoa in virtually any recipe. Some recipes call for rinsing, and/or soaking it first. You can skip this this step since it’s already been rinsed and soaked during sprouting … and rinsed and rinsed again and rinsed some more (see last week’s post for instructions).
And sprouting also allows you to eat quinoa raw. Top your salads, sandwiches or soup with the sprouts—just make sure the sprouts are fresh (no mold!) and that you eat them right away. For details on home sprouting safety, check out this guide published by University of California. Or try lightly steaming or stir frying the sprouts with veggies, herbs and spices for a hearty side dish.
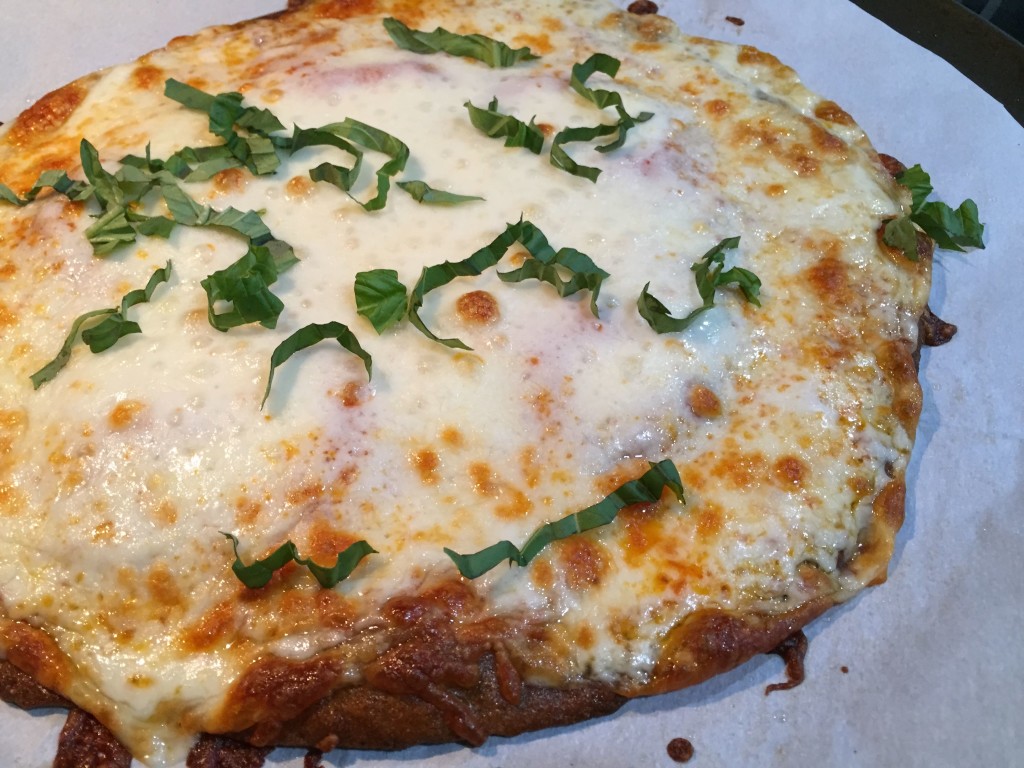
For my sprouts, I wanted simple, yet creative. I stumbled upon the idea of making a pizza crust out of quinoa. I saw some recipes that just called for soaking the grain to soften it. Some were completely raw, and others called for additional flours. In the end, I opted fore just a few ingredients and a crispy, cooked crust.
This crust—seriously—was so much easier than making regular crust from scratch! Plus, way healthier (see all the benefits listed above). Also, it’s pizza! You may remember from my previous posts that my husband is gluten free. So, we haven’t seen many pizzas around our house the last few years. Maybe it’s not NY style crust … but it’s pretty darn good.
Sprouted Quinoa Pizza Crust
I altered a recipe I found on Butter and Sea Salt by adding fresh basil. You can add any fresh or dried herbs, garlic and spices as you like to the crust mix. Once baked, you can top the crust with anything you like: sauce and cheese, meats, sautéed veggies—or just simple olive oil and basil. Let your taste and imagination go wild. This recipe can also be adjusted to make a larger or smaller crust as needed, like for individual pizzas.
1 1/2 cups quinoa, sprouted (more for a thicker consistency)
1/2 cup water
dried or fresh herbs, to taste
1 clove garlic, minced
1/2 teaspoon salt
1/4 teaspoon pepper
2 tablespoons oil, olive or melted coconutSeveral days in advance, sprout the quinoa following last week’s Sprouting 101.
Preheat oven to 450 degrees. Line a baking sheet with well oiled parchment paper.
Place quinoa in a blender or food processor with water, herbs, garlic, salt and pepper. Blend or process until smooth.
Pour the batter onto the baking sheet. Spread to desired thickness and diameter. Bake for 18-30 minutes. Depending on the consistency of the dough, the thickness of the crust and your oven, bake times will vary. Remove the sheet and flip the crust. Place the sheet back and bake for another 10 minutes, or until golden brown.
Remove the crust and add your toppings. Place back into oven until the cheese is melted and the toppings are warmed through.

